Welcome to Mango Presentation Maker (Mango PM)! Mango PM is an amazing presentation maker that you can use to create animated presentations, promotional videos, interactive micro-lessons, and much more.

This tutorial will take you through the interface and some basic features of Mango PM, and use it to quickly create a dynamic presentation in 4 steps.
Part 1: Installation and Register #
Install Mango PM
Mango PM is available for download on Windows. You can download the software from:
Once the download is complete, open the installation package to install the software.
Create a new account
After the installation is completed, you can use the following options to create a new account:
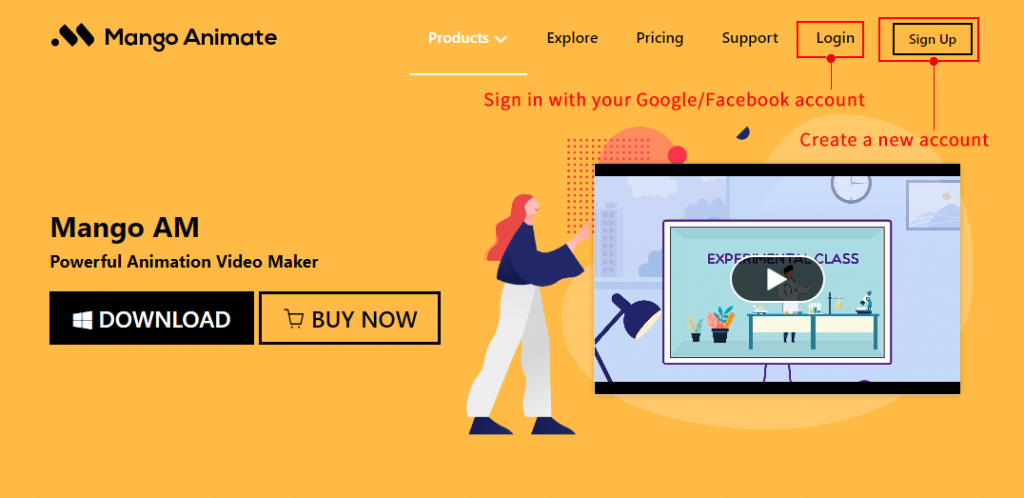
- Go to the Mango Animate sign up page
- Sign in with your Google/Facebook account
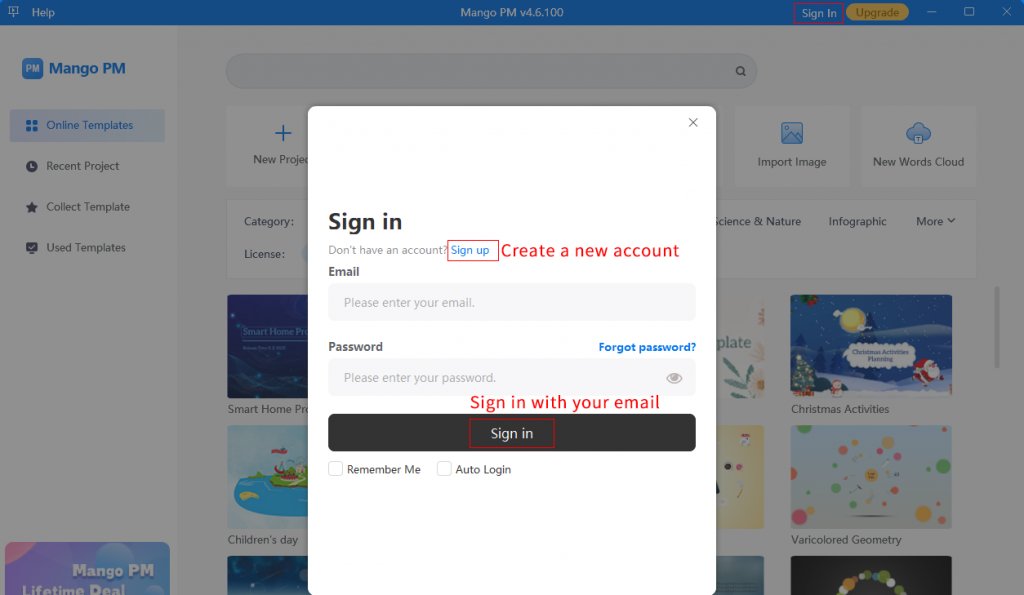
- Create a new account within Mango PM
Part 2: User Interface #
Before introducing the user interface, let’s get acquainted with a few basic concepts in Mango PM.
- Frame: It is equivalent to a shot of a film. In Mango PM it is equivalent to a page of a presentation.
- Path: The order of the frames. To adjust the path is to adjust the order in which the frames are played.
- Layer: Film containing elements such as text/images. Multiple layers are stacked together in order and combined to form the final effect of a page.
- Interaction: Interacting with each other. Controlling an object to trigger another object to complete a series of behavior.
Home Screen
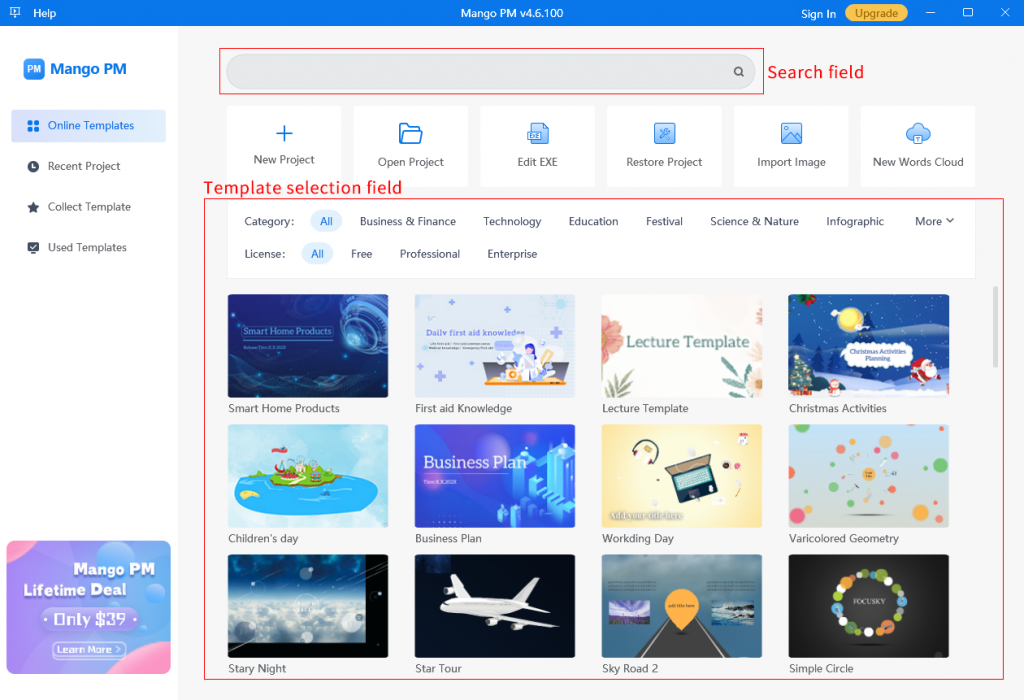
Starting Mango PM, the home screen appears, which includes the following options:
1. Sign in: Register a new account or sign in your account.
2. Search field: You can enter keywords to search templates within the software.
3. New Project: Create a new presentation project.
4. Open Project: Open a saved project.
5. Edit EXE: Open and edit a project that has been published as an EXE file.
6. Restore Project: Restore an abnormal opening project.
7. Import Image: Create a new project by importing images.
8. Template selection field: You can select a template to create a new project in this field.
9. New Words Cloud: Create a new project by creating a word cloud.
Editor
Once the project has been created you can access the editor. Here are the features of the editor in the following sections.

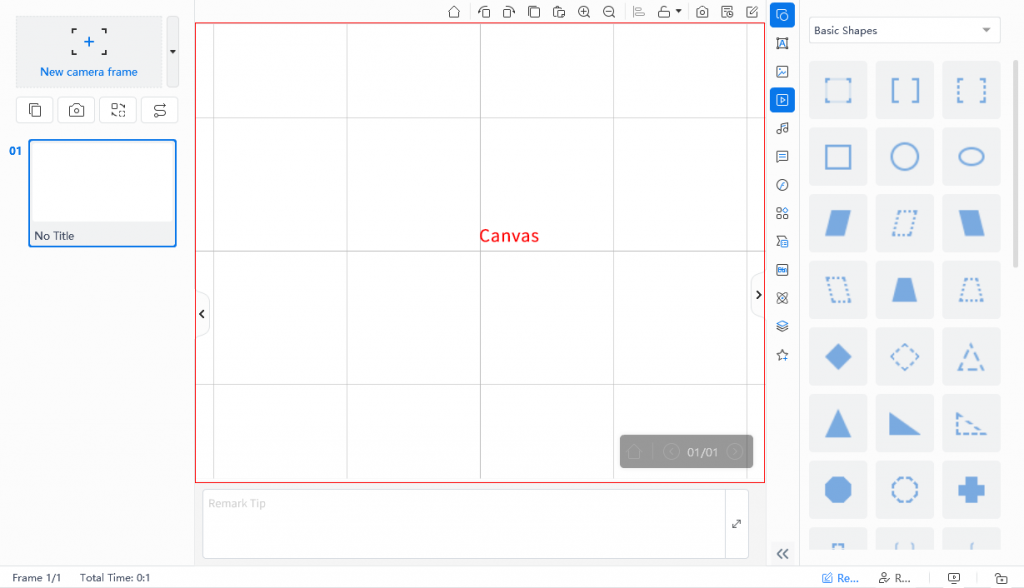
1. Canvas
You can add multimedia materials into the canvas, and adjust their size and position.
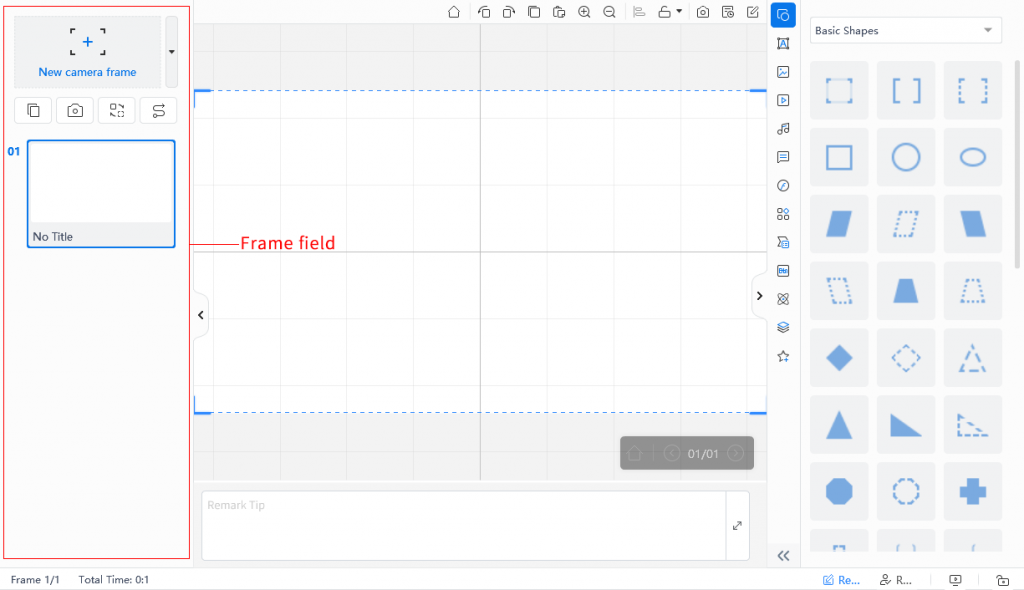
2. Frame field
You can add frames and transitions, and adjust frames’ position.
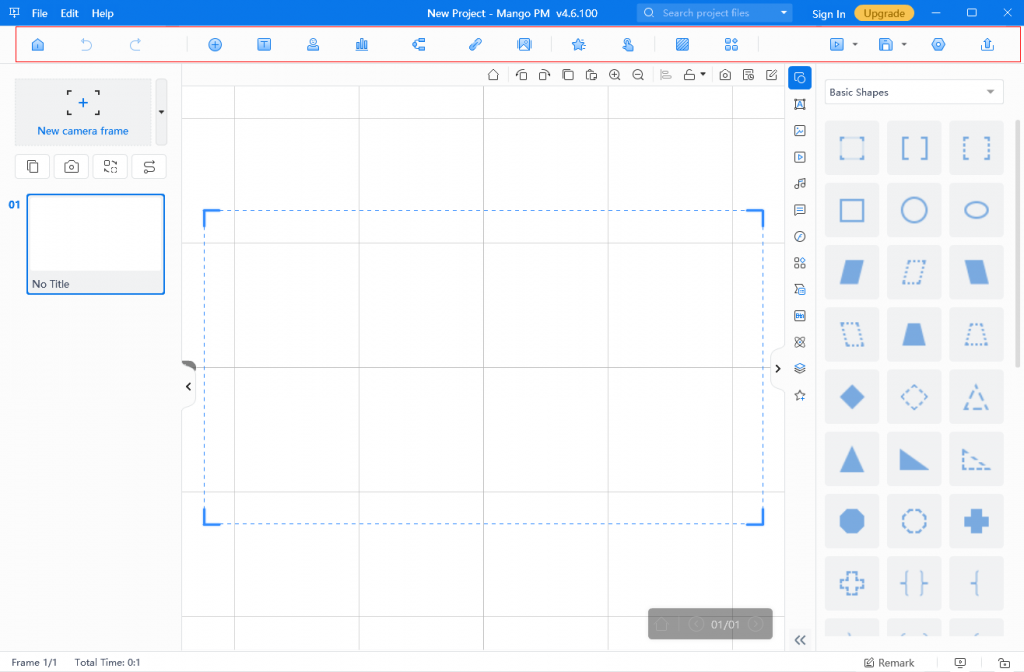
3. Main toolbar
- Home: Click to return to the home screen.
- Undo / Redo: Undo or redo operations.
- Insert: Insert multimedia materials: shapes, text, images, videos, music, bubble, SWF, icon, smart art, component, sci shapes, and other files.
- Text: After clicking on[Text], click on the canvas to add a text box and enter text in it.
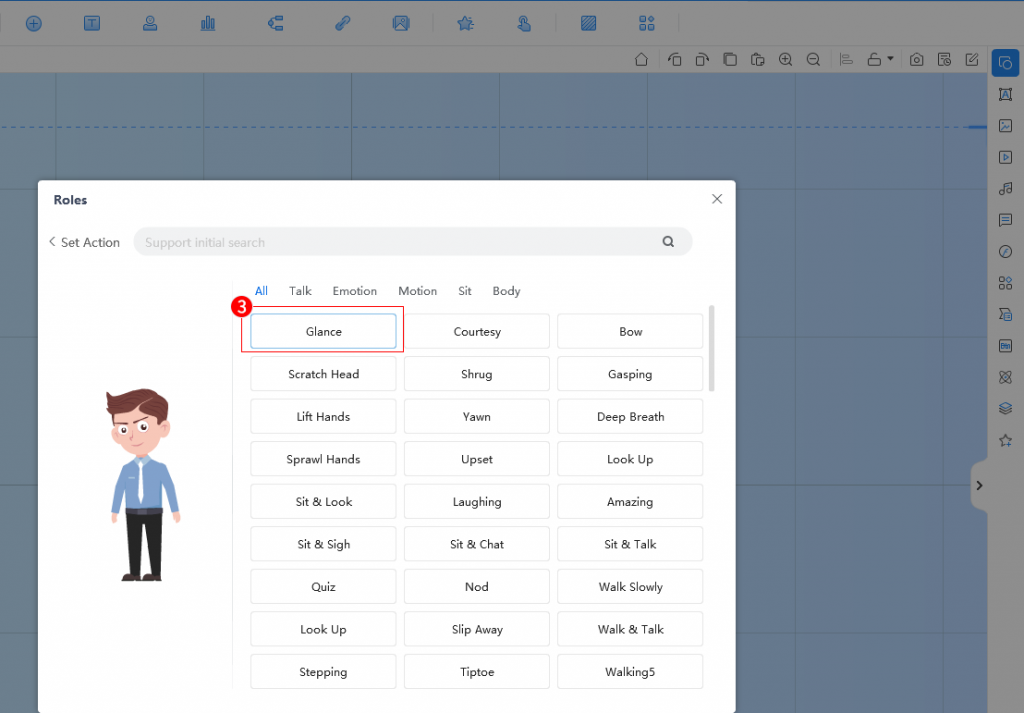
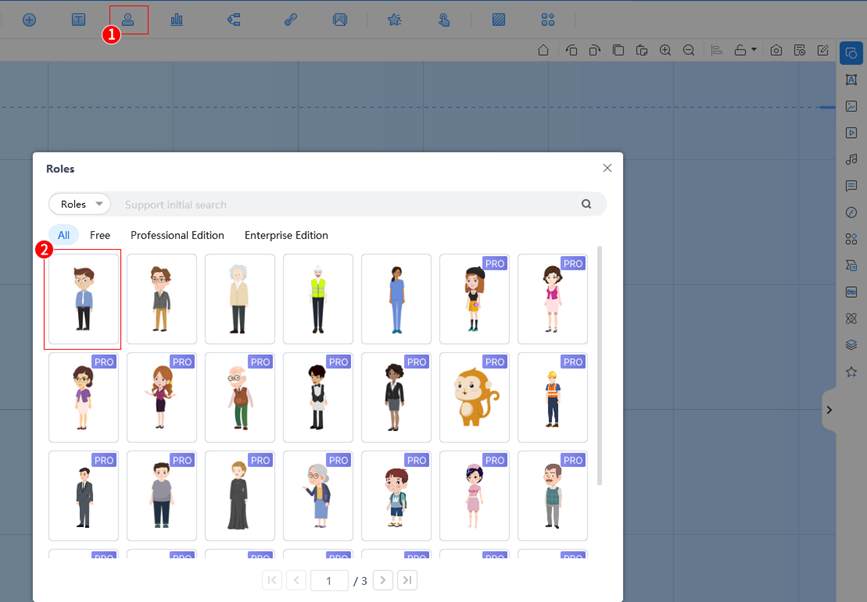
- Roles: Insert animate roles.
Click on a role to enter the role action selection page and select an action to add the role to the canvas.
- Chart: Insert various charts.
- Mind Map: Insert various mind maps.
- Link: Add a link to a material.
- Slide Show: Import images to form a slide show to be inserted into the canvas.
- Animation: Add entrance animation, emphasis animation, exit animation, and action paths to materials.
- Interaction: Adding interaction to objects is to control the object to trigger another object or system to perform a series of behavior.
- Background: You can select a type of background to add to your project, or you can add a custom background.
- More: You can add a theme, layout, tool kit, content, and formula to your project.
- Preview
You can preview the presentation in 3 ways: preview from the current frame; preview from the beginning; preview from the split screen.
- Save: Save the project to your local folder.
- Options: Various settings for your project file: general settings, exhibition settings, BGM/video settings, about settings, pre-loader settings, encryption settings, and share settings.
- Publish: You can publish your project as an EXE file, video, PDF file, HTML5 web page, and archive file.
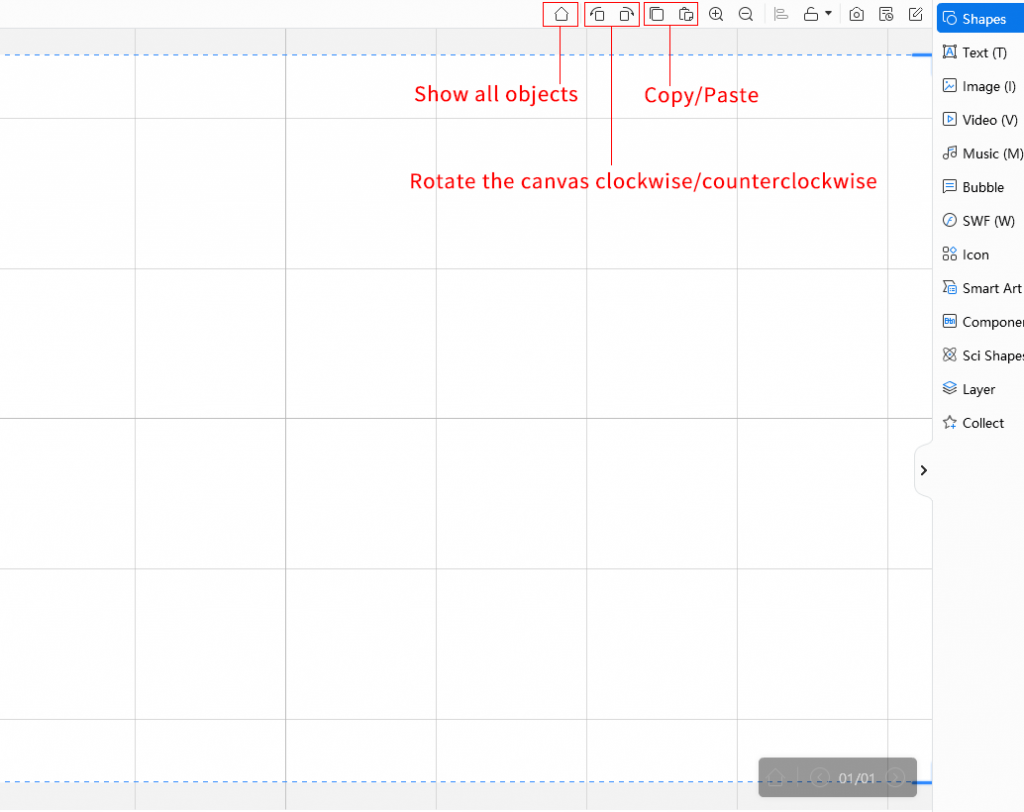
4. Quick toolbar
- Show all objects: Click on this button to quickly shrink the canvas so you can see all the objects in this frame.
- Rotate the canvas clockwise: You can rotate the canvas clockwise.
- Rotate the canvas counterclockwise: You can rotate the canvas counterclockwise.
- Copy / Paste: Copy and paste objects.
- Zoom in / Zoom out: Zoom in or zoom out on the canvas.
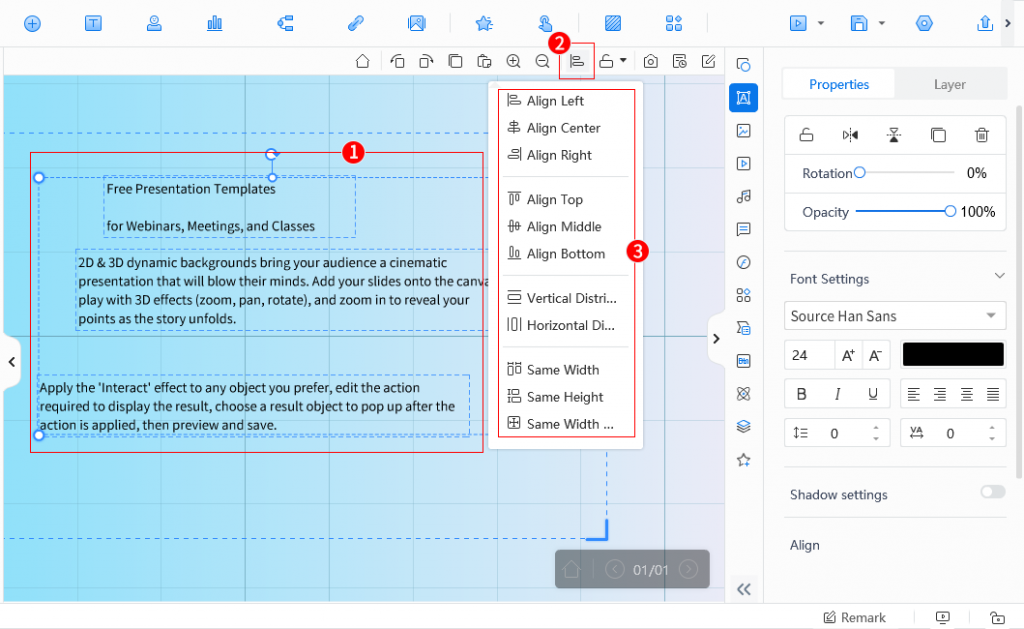
- Alignment settings: Select two or more objects and click on [Alignment Settings] to set different types of alignment for them.
- Lock the canvas: The canvas cannot be moved after it is locked.

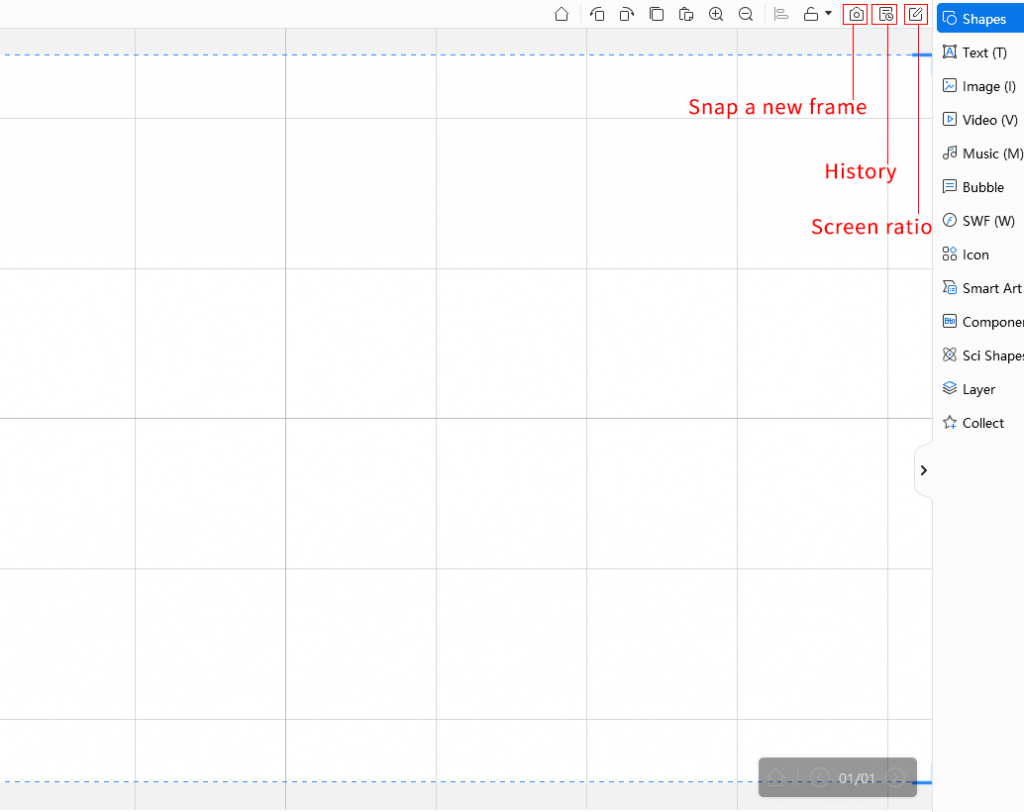
- Snap a new frame: Click on [Snap a New Frame] to quickly add a frame to the path from the current canvas viewport.
- History: You can view the history of your operations on the canvas.
- Screen ratio: Change the display ratio of the project.
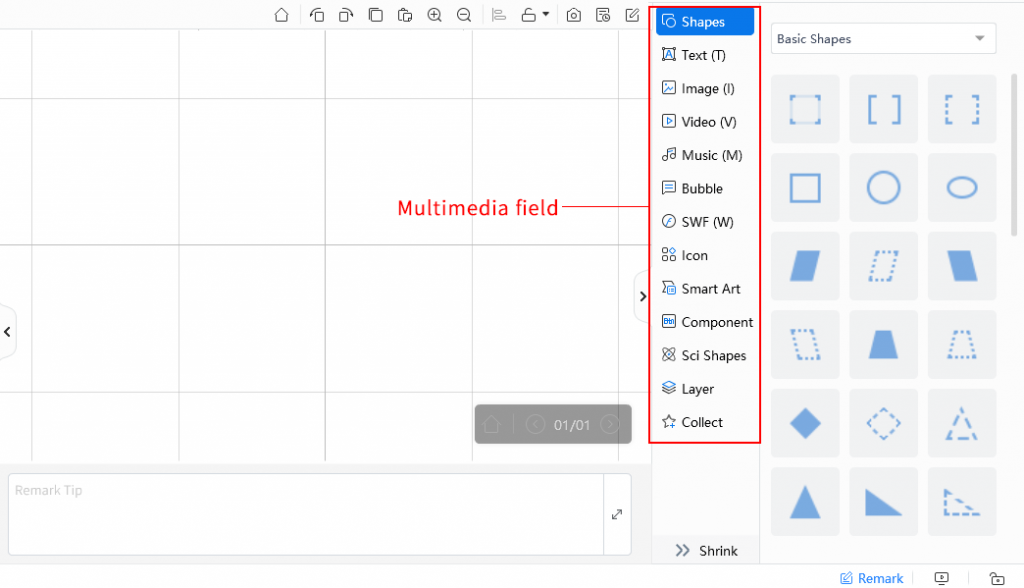
5. Multimedia field
In this field, you can add a lot of multimedia materials to your presentation to make it more vivid.
Shapes: Add various shapes. Click on a shape to add it to the canvas.
Text: Select any font and click it to add to the canvas.
Image: You can add online images for decoration or local images.
Video: You can add local videos and screen recordings.
Music: You can add local music, mic recordings, and online background music. You can also use the [Text to Speech] function to enter text and generate AI-synthesized speech.
Bubble: Add various bubbles and you can change the fill colors. Double-click on the text in the bubble to set the font.
SWF: Add local SWF and online SWF. Click on any SWF to add it to the canvas.
Icon: Add various icons. Click on any icon to add it to the canvas.
Smart Art: Add various smart art. Double-click the text to set the font.
Component: Add various buttons. Click to add in the canvas, and change the button icon and style.
Sci Shapes: Add various sci shapes. Select a scientific shape and click on the canvas to add it.
Layer: View the layer order. Mouse dragging to adjust the layer order.
Collect: The materials you collect are shown here. Click an object and select[Collect] in the right-click pop-up to collect it.
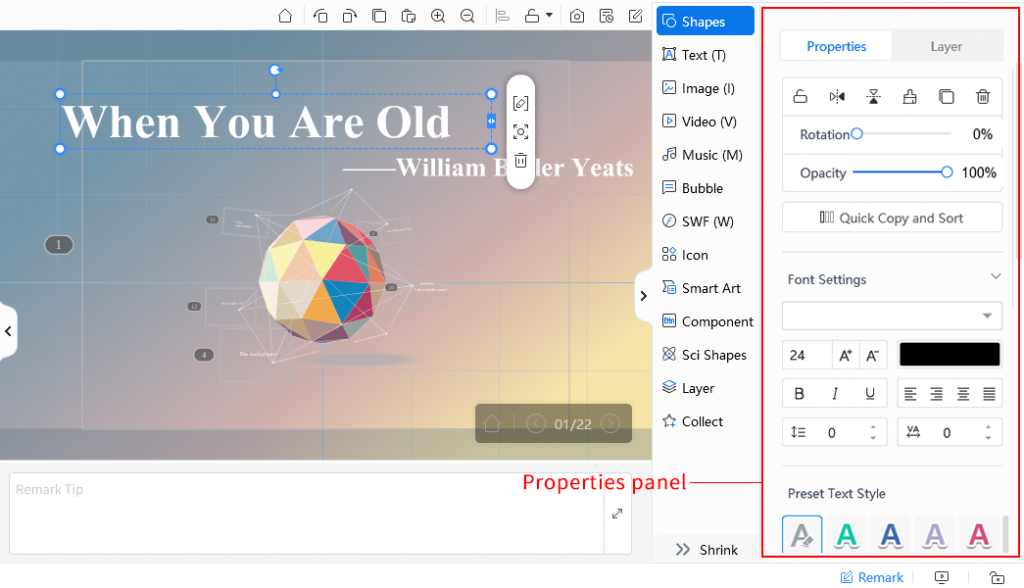
6. Properties Panel
When clicking an object in the canvas, the properties panel appears. You can do the following with the object in the properties panel: lock the object, flip it horizontally and vertically, quickly paste the object, rotate the object and adjust its opacity, etc.
Other property settings for the material can be performed in the properties panel, such as font style settings, color settings, shadow settings, etc. Clicking different materials will result in different property settings.
Part 3: How to quickly create a dynamic presentation #
In this tutorial, we will use Mango PM to create a basic presentation and publish it as an EXE file.
Step 1: Create a new project
There are 4 methods to create a new project:
- Create a new blank project
- Create a new project by importing images
- Create a new project by creating a word cloud
- Create a new project by using a template
Method 1: Create a new blank project
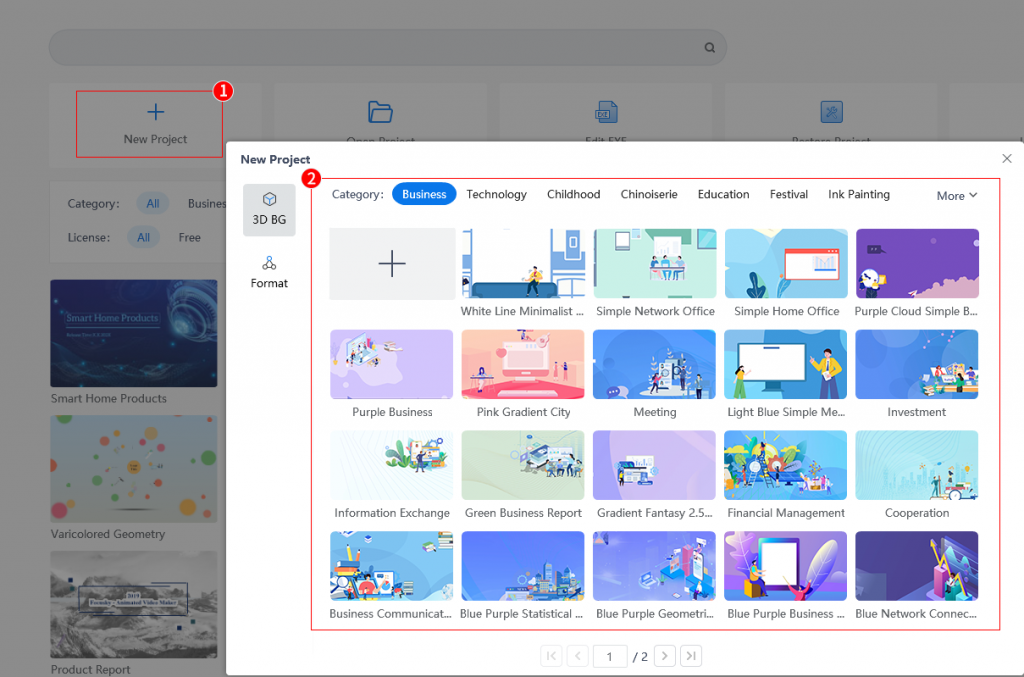
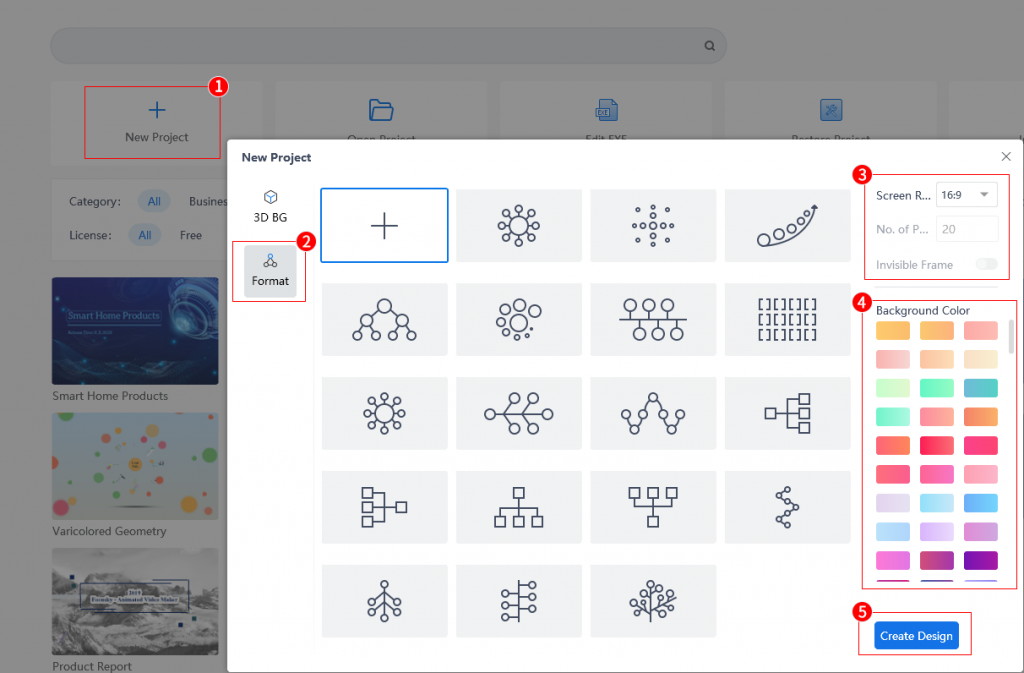
1. In the home screen, click on [New Project], select a 3D background or click on [+] to enter the editor.
2. Or click on [Format] to set the screen ratio;
3. Select a background color you want;
4. Click on [Create Design] to enter the editor.
Method 2: Create a new project by importing images
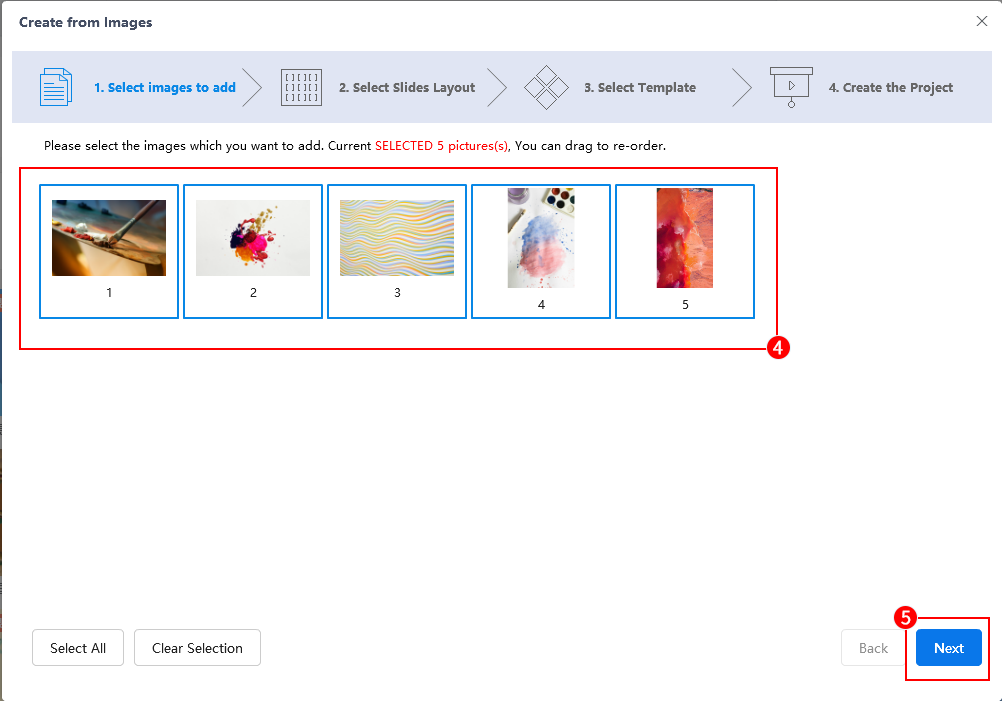
1. In the home screen, click [Import Image], import the images;

2. Select the images to create presentation > [Next];
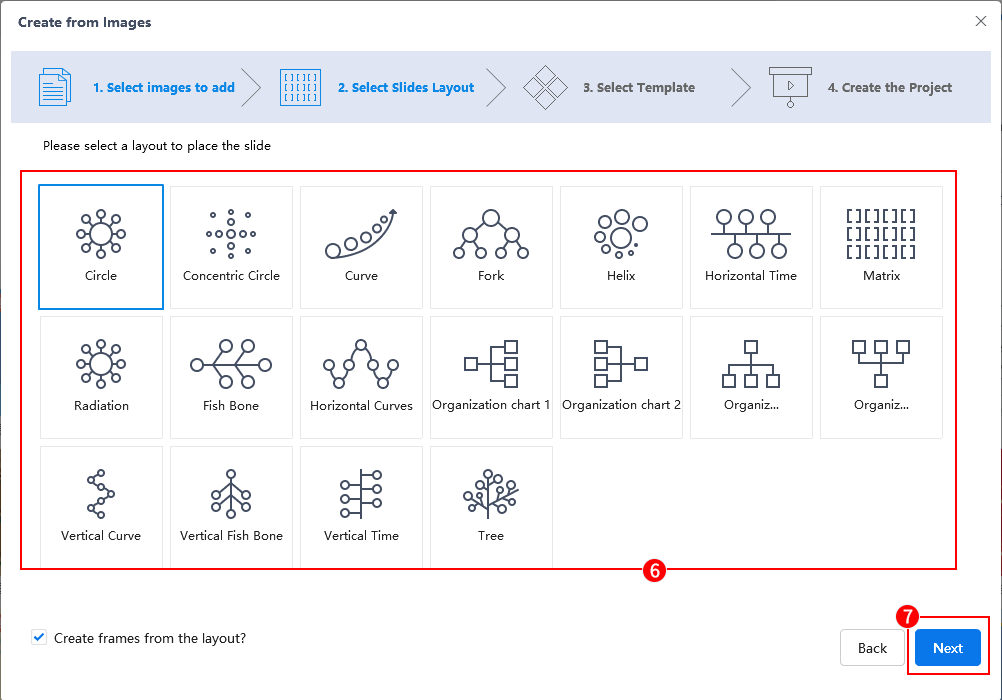
3. Select a layout to place the slide > [Next];
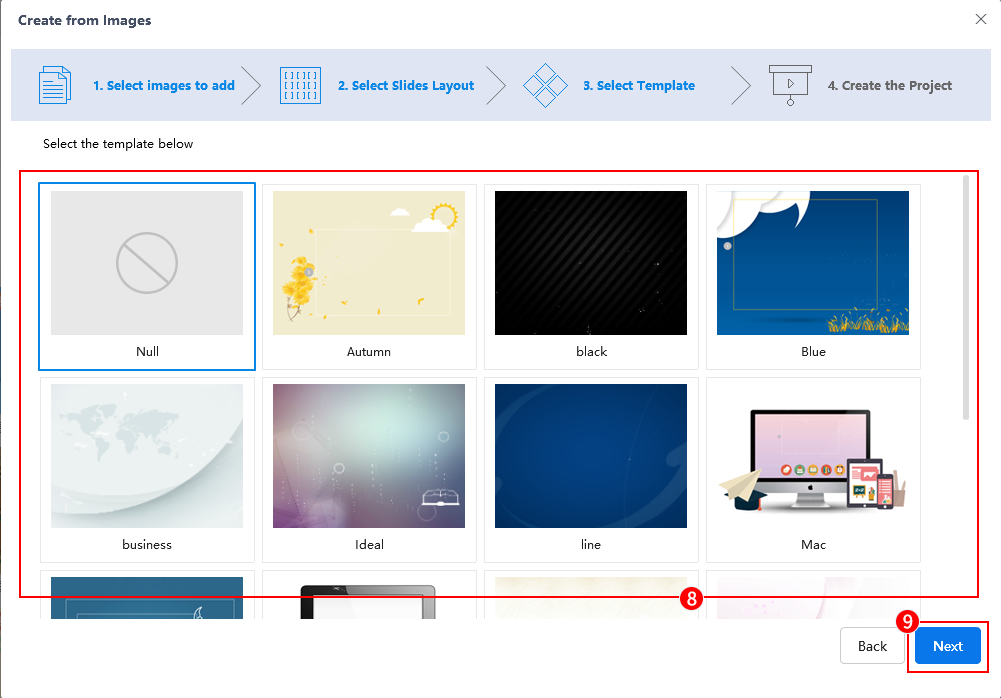
4. Select a background template, and then click [Next] to enter the editor.
Method 3: Create a new project by creating a word cloud
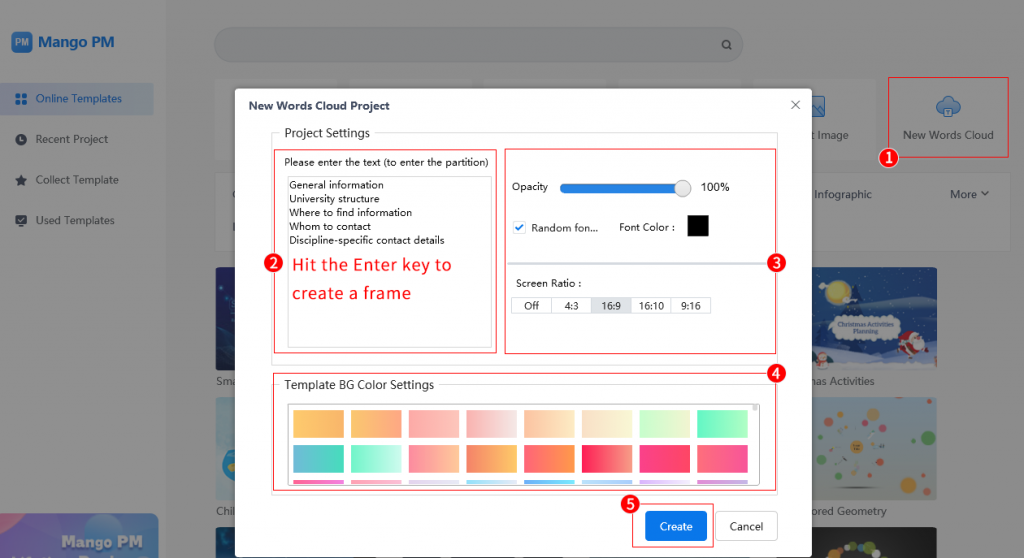
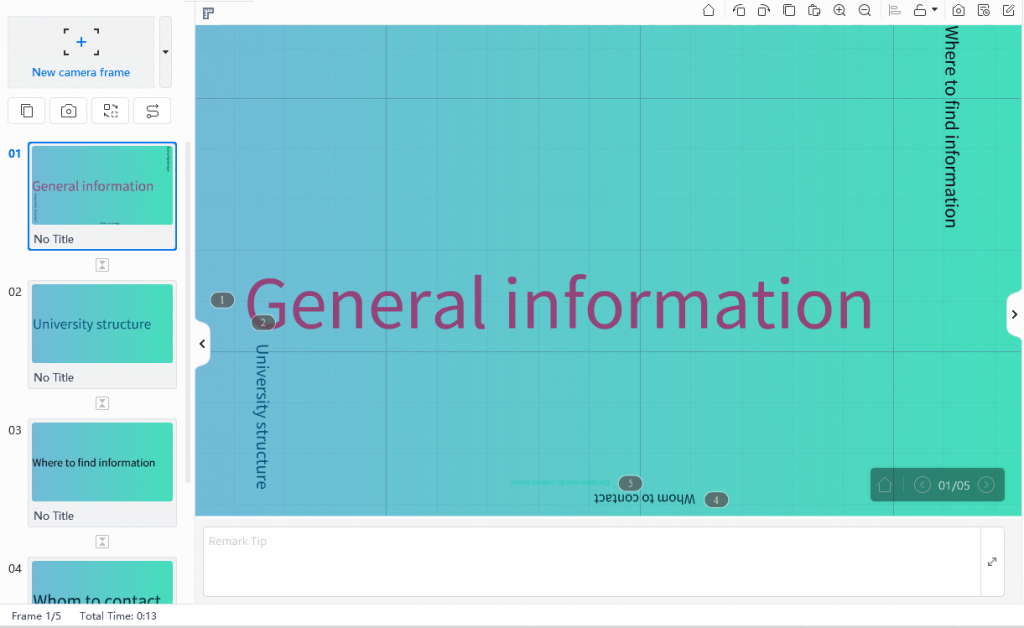
- In the home screen, click [New Words Cloud]. Enter text in the blank area and hit the Enter key to create a frame;
- Adjust text opacity, select font color, and screen ratio;
- Select a background color, and click [Create] to enter the editor.
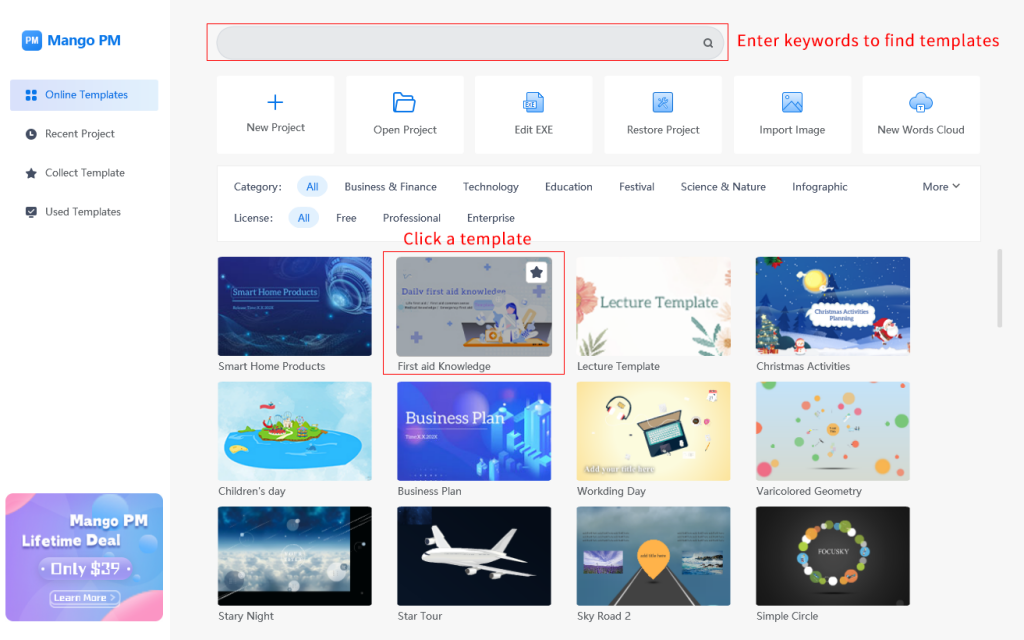
Method 4: Create a new project by using a template
Click a template in the template selection field to enter the editor. You can enter keywords in the search field to quickly search for a template you want. Then you can modify the content of the template directly to make your presentation quickly.
Step 2: Add content
Add content such as frames, text, images, videos, other decorations, etc. to make a complete presentation.
1. Add a frame:
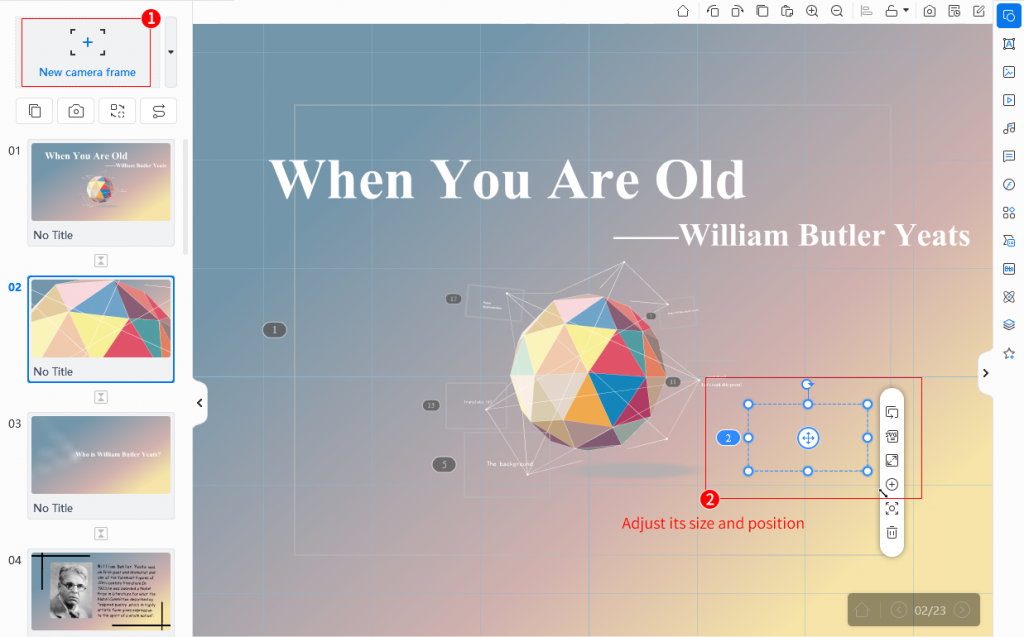
Adding a frame is equivalent to adding a page to a presentation. The added frame is similar to the slide in PowerPoint. The difference is that the frame here can be scaled, panned, and rotated.
Click [New camera frame] to add a frame, and adjust its size and position in the canvas.
- Add a frame with a panning effect
Add a frame of the same size and place it next to the previous frame.
- Add a frame with a zooming effect
Add a different-sized frame to create the zooming effect.
- Add a frame with a rotating effect
Add a frame of the same size and rotate it to create the rotating effect.
2. Add materials:
Materials are added to the current frame of the canvas. You can select a frame in the frame field to add materials.
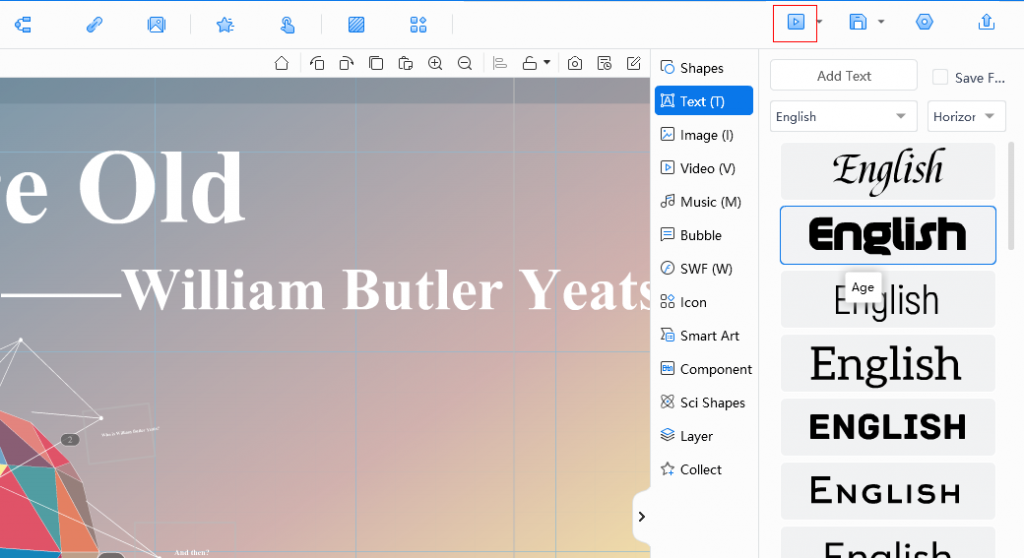
(1) Add text
To make a presentation, it is necessary to enter titles and the main text.
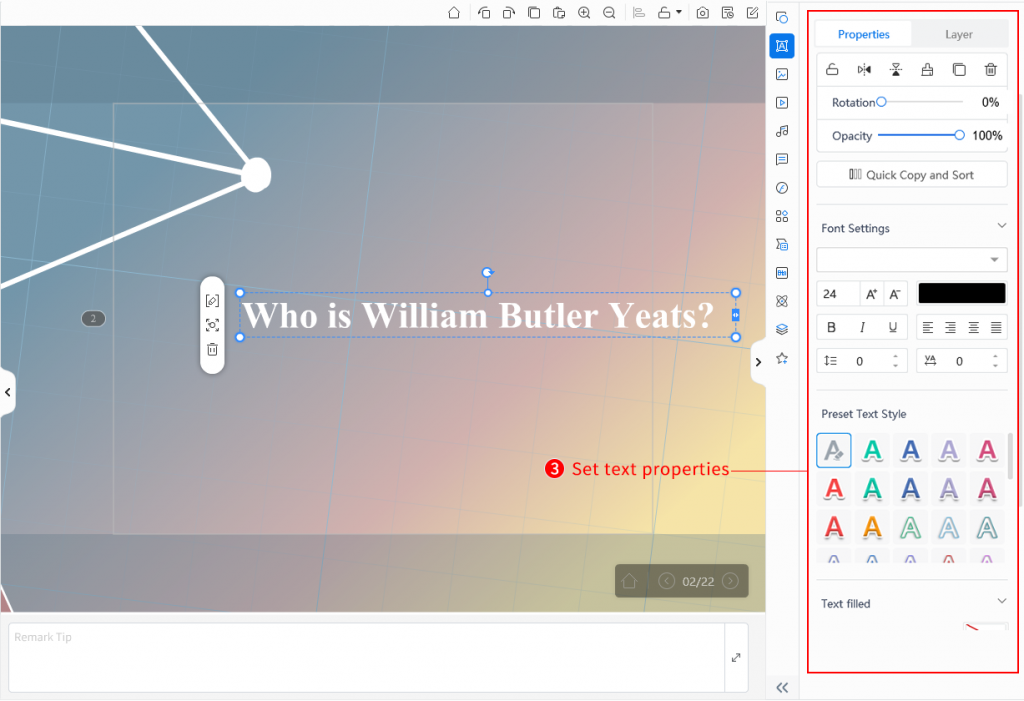
Click [Text] in the multimedia field > select a font > click the canvas to add a text box, then enter a title in it.
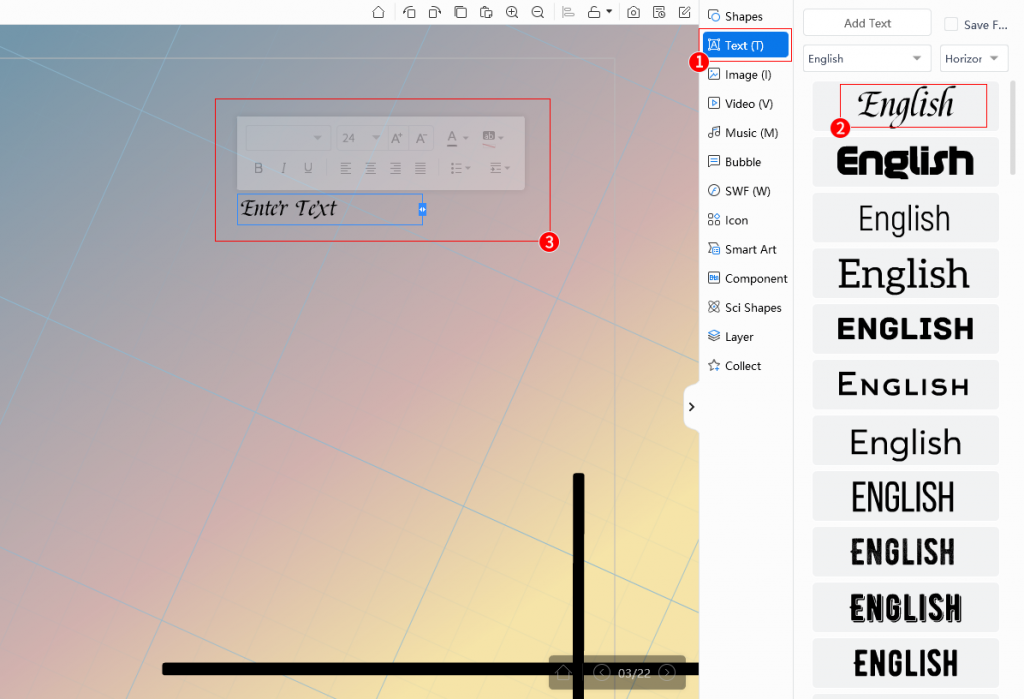
In the properties panel, set text properties such as color, font, text style, etc.
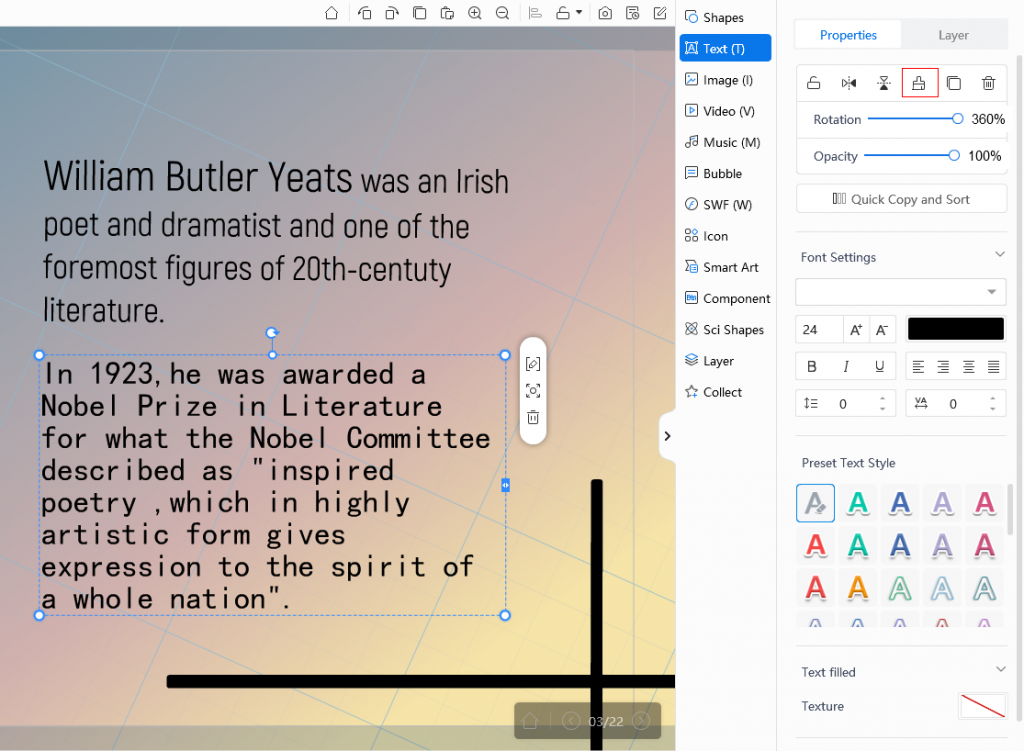
Copy your scripts to the canvas. Once added the scripts, select a paragraph to set its property. Click on [Format Painter] and then click on other text to quickly set the same text format for other paragraphs.
After setting the text style, you can select multiple paragraphs and click on [Alignment settings] to align them. (Hold down the Shift key and click on multiple objects.)
(2) Add decorations
Add decorations such as shapes, images, videos, bubbles, SWF, icons, smart art, component, sci shapes, roles, and interaction. Here is an example of adding an image and a role.
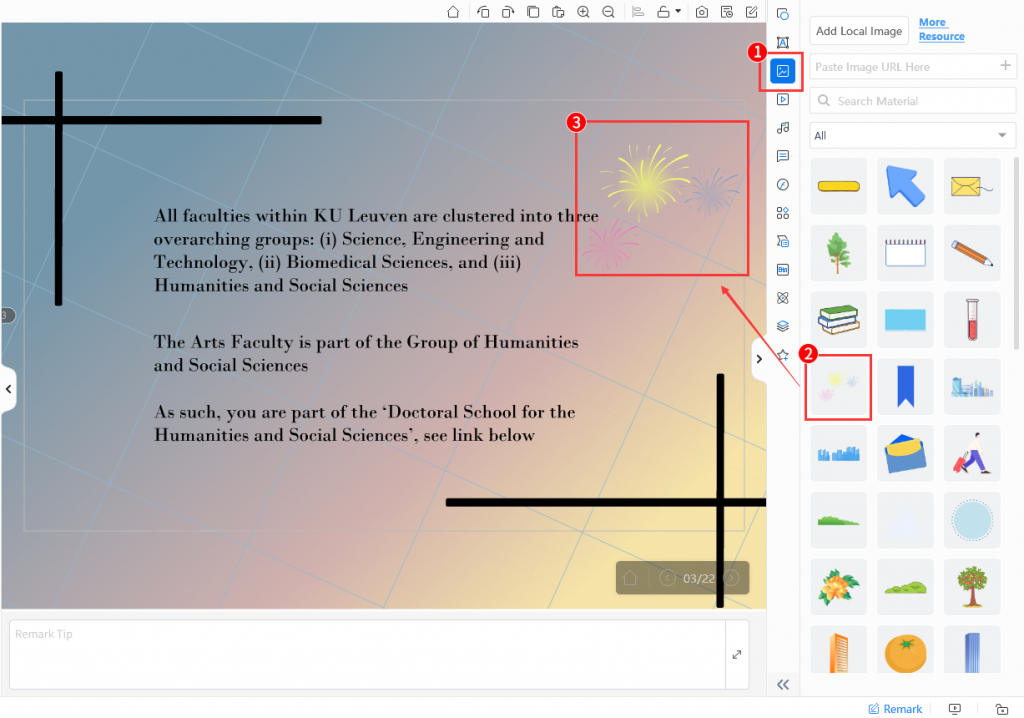
- Add images
Click [Image] > click a material to add to the canvas, and drag the material to adjust its size and position.
- Add a role
Click [Role] > select a role > select an action, then adjust its size and position in the canvas.

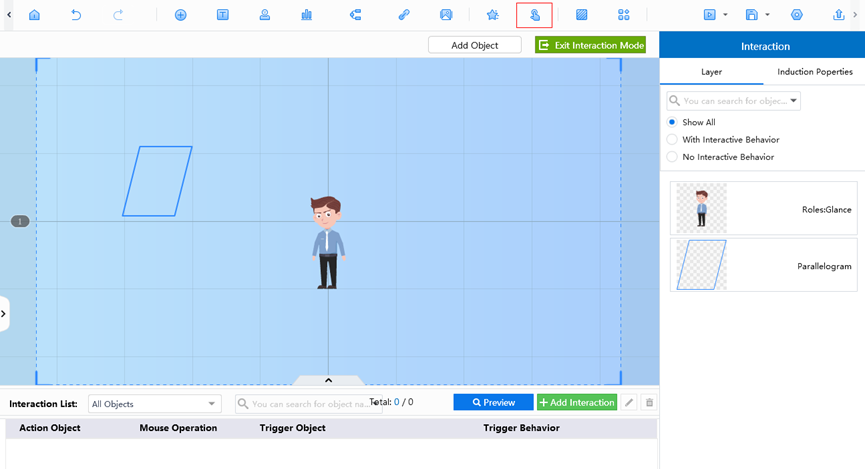
3. Add interaction
Interaction is an advanced content setting. If you need to use this feature, you can click [Interaction] to enter the interaction mode to add interaction behavior to the object.

Step 3: Add animation
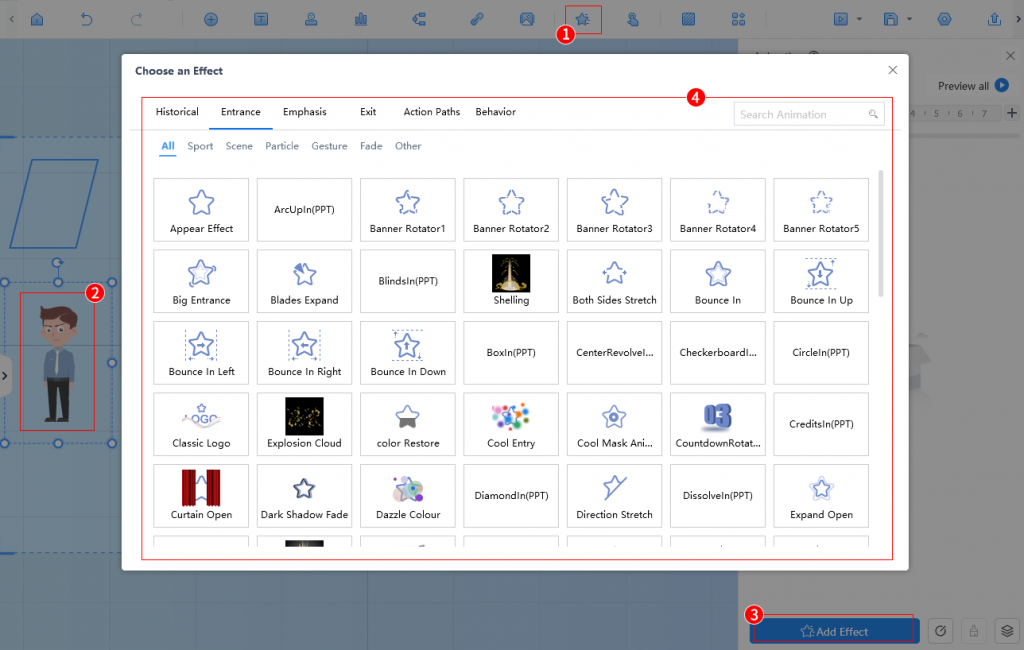
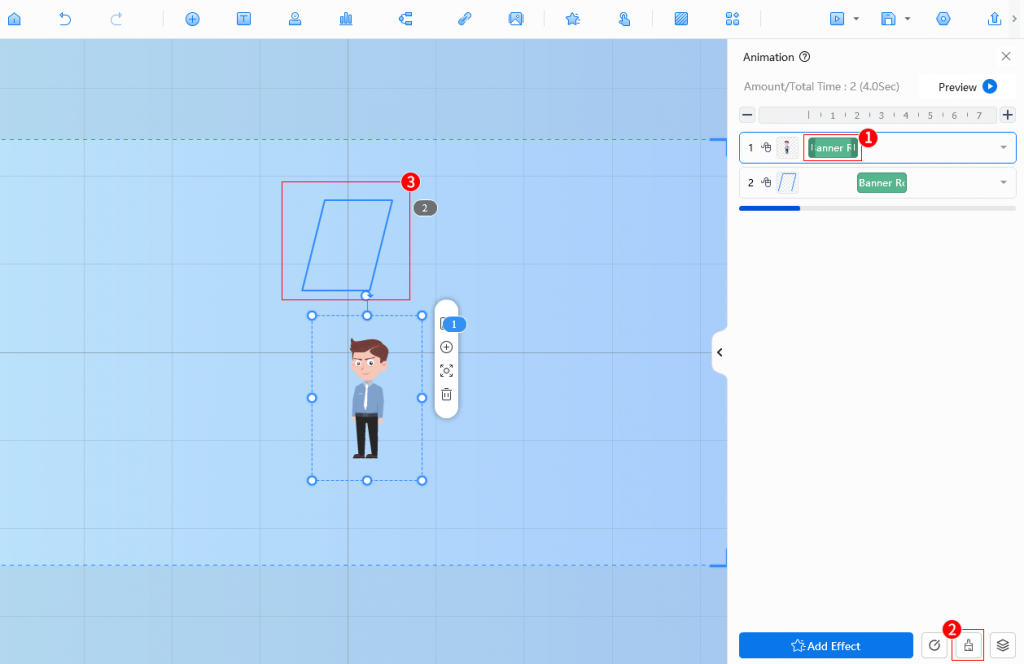
1. After adding all the text and decorative materials, click on [Animation] in the editor and select the object to be animated in the canvas then click [Add Effect].
2. Select the animation you like and hover over it to preview the animation.
3. Use the animation format brush to synchronize the animation effects of multiple objects. Click an effect > [Animation format brush] > click the object on the canvas. (Click to apply animation to another object, and double-click to apply animation to multiple objects.)
In addition to adding animation effects to materials, you can also add transitions to your presentation.
Note: Adding transitions can take a long time in the publish, so please add them at your discretion.
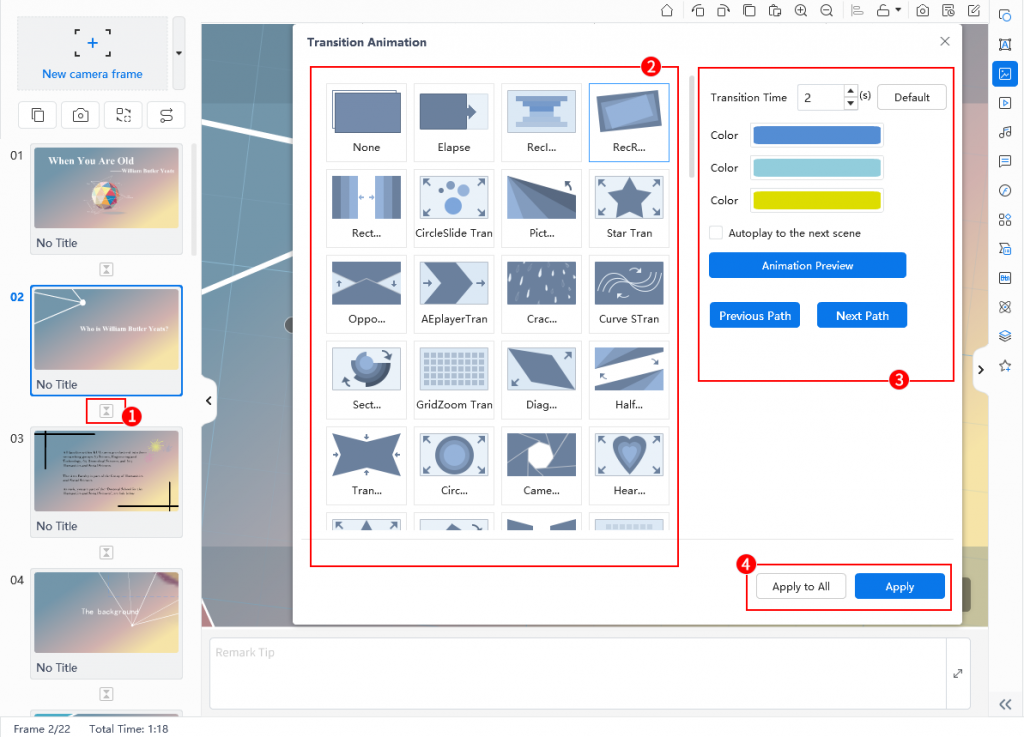
- After making a multi-page presentation, you can click on [Transition] in the editor to add a transition effect between each page.
- You can choose the preferred transition effect and set the transition time. You can also set the color of some transitions.
- After setting the transition, click [Apply to All] to set all transition effects, and click [Apply] to set the current transition effect.
Step 4: Preview and publish
Preview the project
Once your presentation is done, you can click to preview the effect.
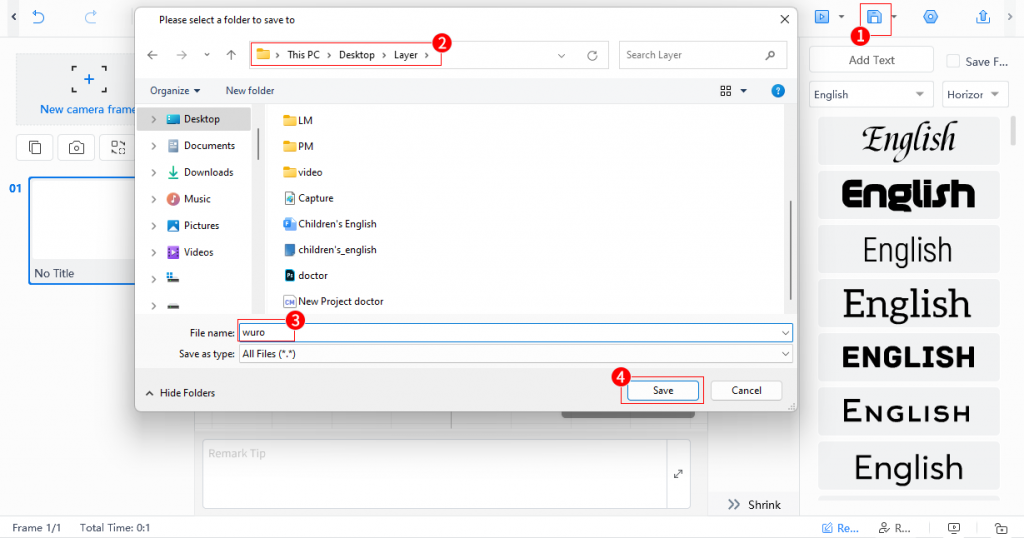
Save the project
Save the project for the next time you open it for further editing.
Click [Save] > select a folder to save to > set the file name > [Save].
Publish the project
When the project is finished, click [Publish] to export it for sharing with others. You can publish your project as an EXE file, video, PDF file, HTML5 web page, and archive file.
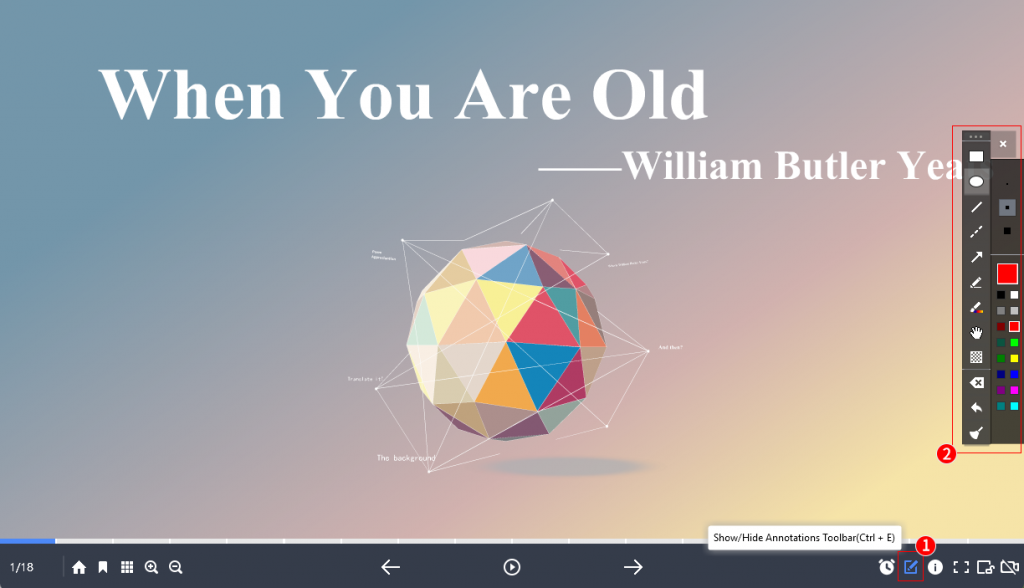
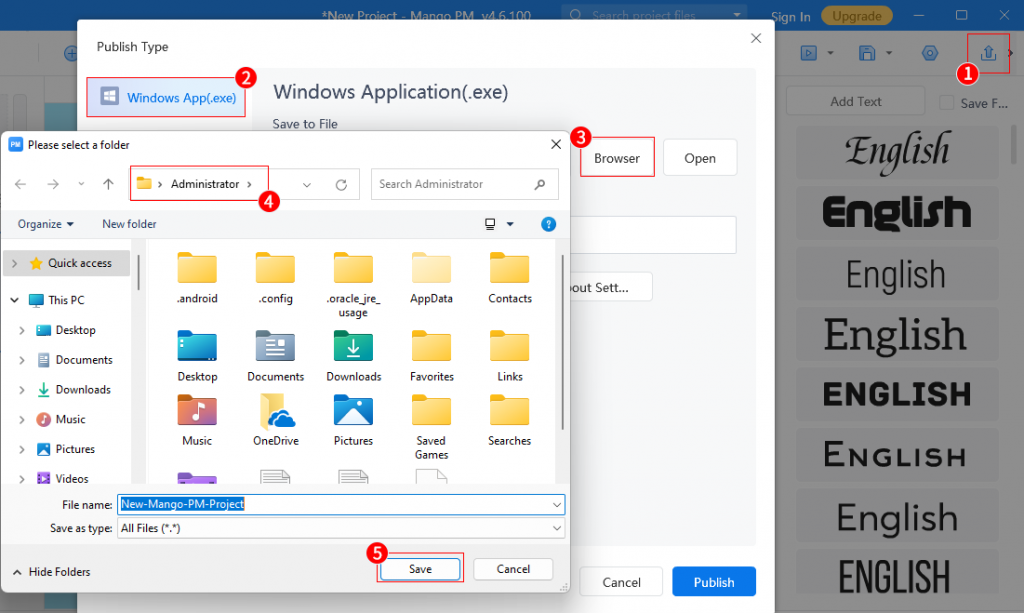
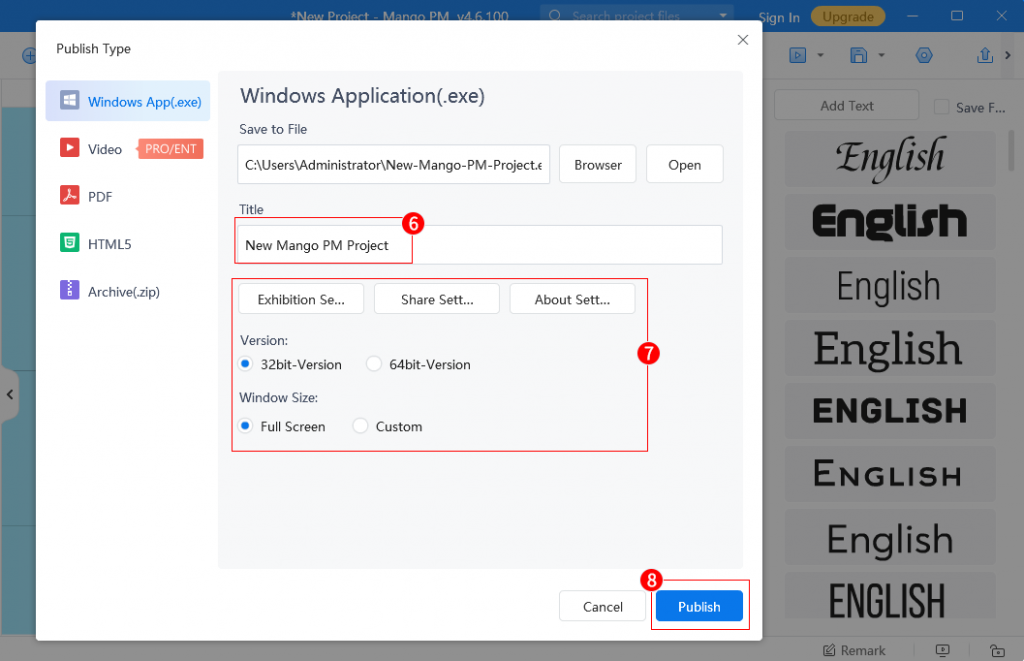
Here is an example of publishing as an EXE file. Publish as an EXE file to make it easier to demonstrate, and you can draw annotations when demonstrating the presentation.
Click [Publish] > [Windows App] > select a directory > set the file name > [Save] > enter a title of the project > set exhibition, share and about > set version and window size > [Publish].
When demonstrating, click [Show/Hide Annotations Toolbar] > select an annotation tool > draw annotations.