Welcome to Mango Animate Character Animation Maker (Mango Animate CM)! Mango Animate CM is a powerful character animation software for making animated characters and skeletal animation. With Mango Animate CM, you can turn any static image into an engaging animated character in minutes.

This tutorial will show you the very basics you need to get started in Mango Animate CM, and how to build and animate your character in simple 5 steps.
Part 1: Installation and Register #
Downloading Mango Animate CM
Mango Animate CM is available for download on Windows. You can download the software from:
Creating a New Account
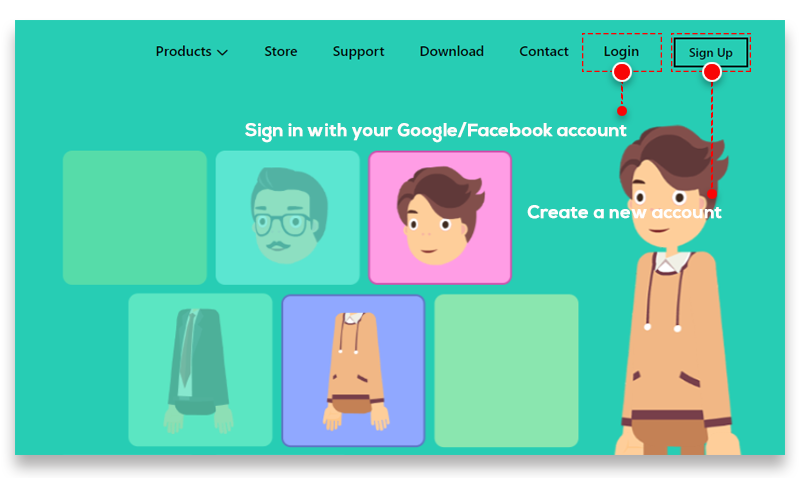
After the installation is completed, you can use the following options to create a new account:
- Go to the Mango Animate sign up page
- Sign in with your Google/Facebook account
- Create a new account within Mango Animate CM
Part 2: User Interface #
Start Screen
When starting Mango Animate CM, a Start Screen will appear. It contains options to create a new project or edit an existing project.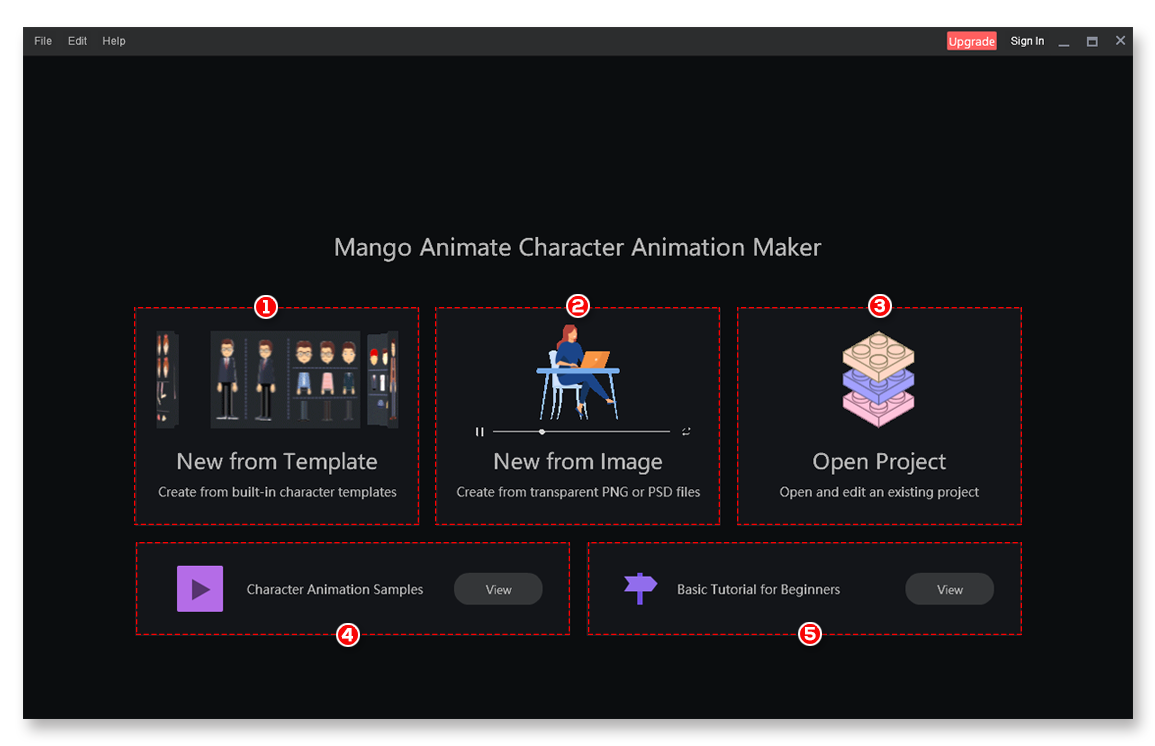
1. New from Template
Create a new project based on a character template.
2. New from Image
Create a new project based on a PNG image or PSD file.
3. Open Project
Open and edit an existing Mango Animate CM project.
4. Character Animation Samples
Allow viewing and using pre-made character animation templates.
5. Basic Tutorial for Beginners
View a list of basic tutorials to get started with Mango Animate CM.
Home Screen
When you click on the New from Template or the Character Animation Samples button, the Home Screen appears, which includes the following options:
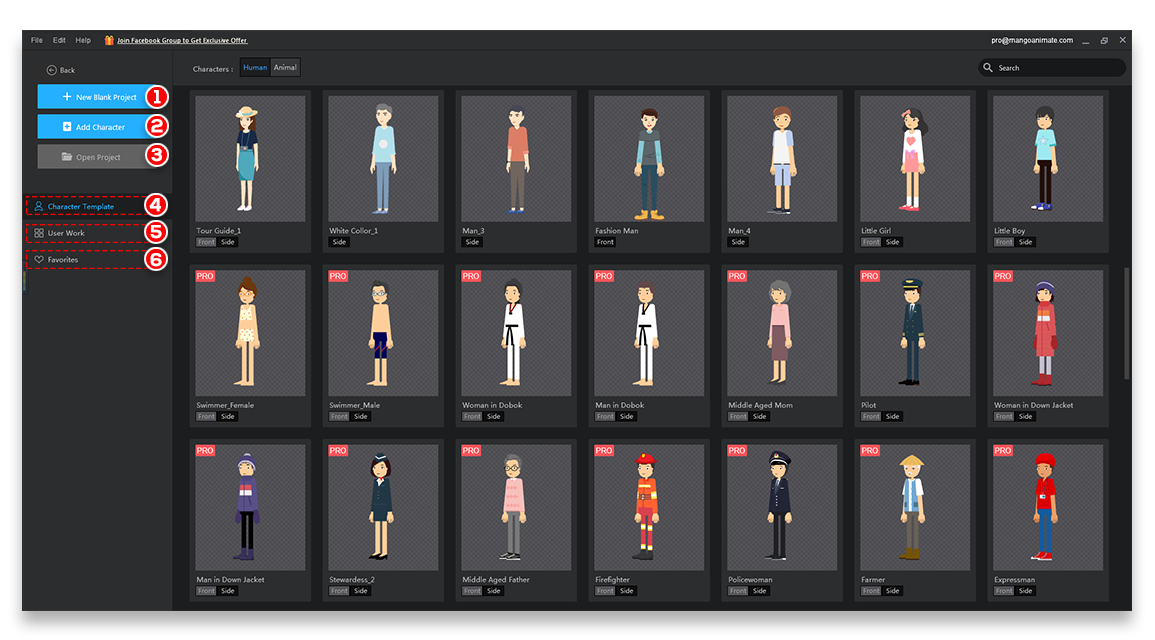
1. New Blank Project
Create a new blank project.
2. Add Character
Import your own character.
3. Open Project
Open an existing Mango Animate CM project.
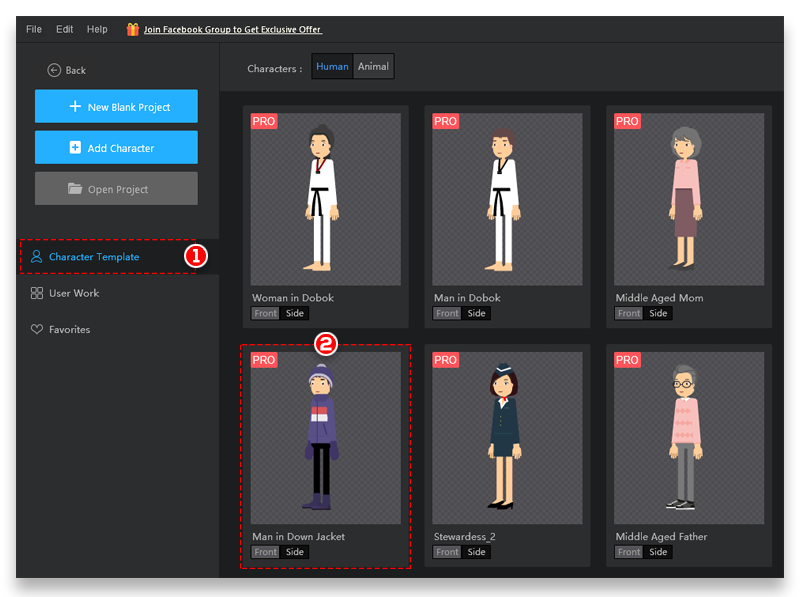
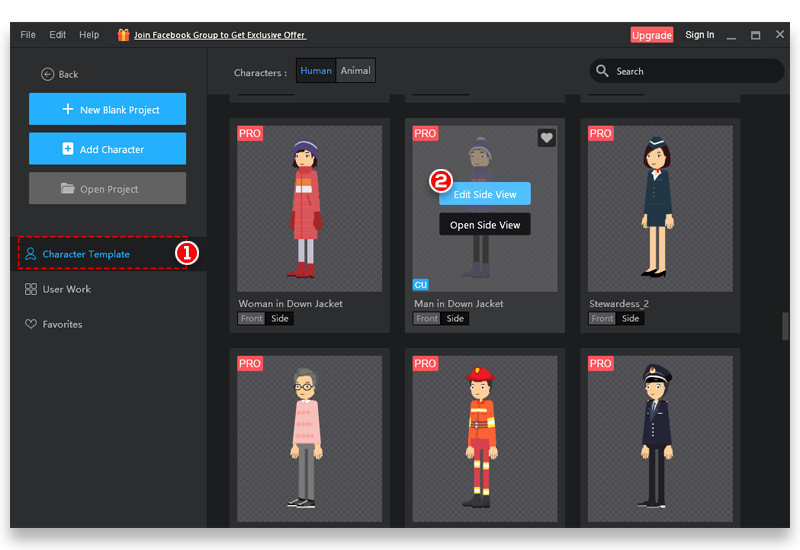
4. Character Template
View a wide range of ready to use character templates. Every character is well-designed and fully rigged. You can customize the characters according to your needs.
5. User Work
Find a list of character animation samples.
6. Favorites
Characters you mark as Favorite are shown here.
Editors
Mango Animate CM provides 2 different editors for creating and modifying your character animation.
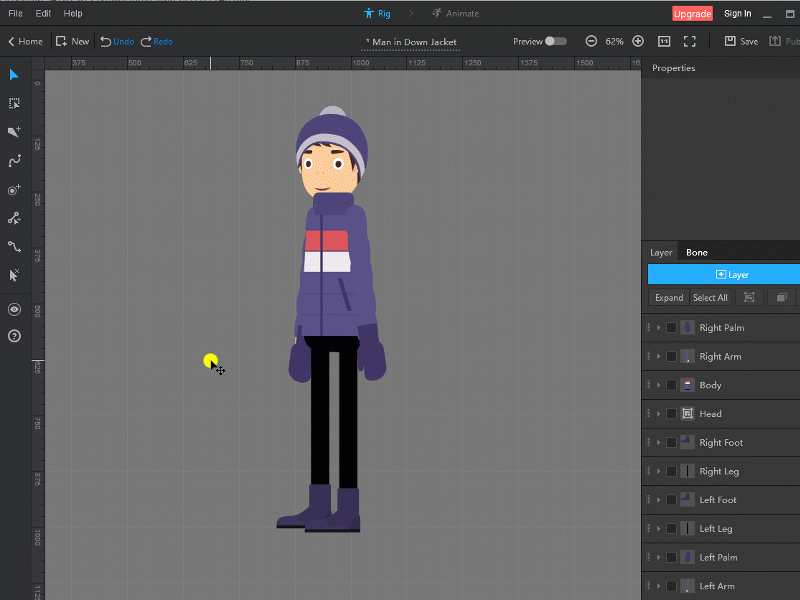
Bone Editor (Rig Mode )
Bone Editor allows you to create bone structures for your character.
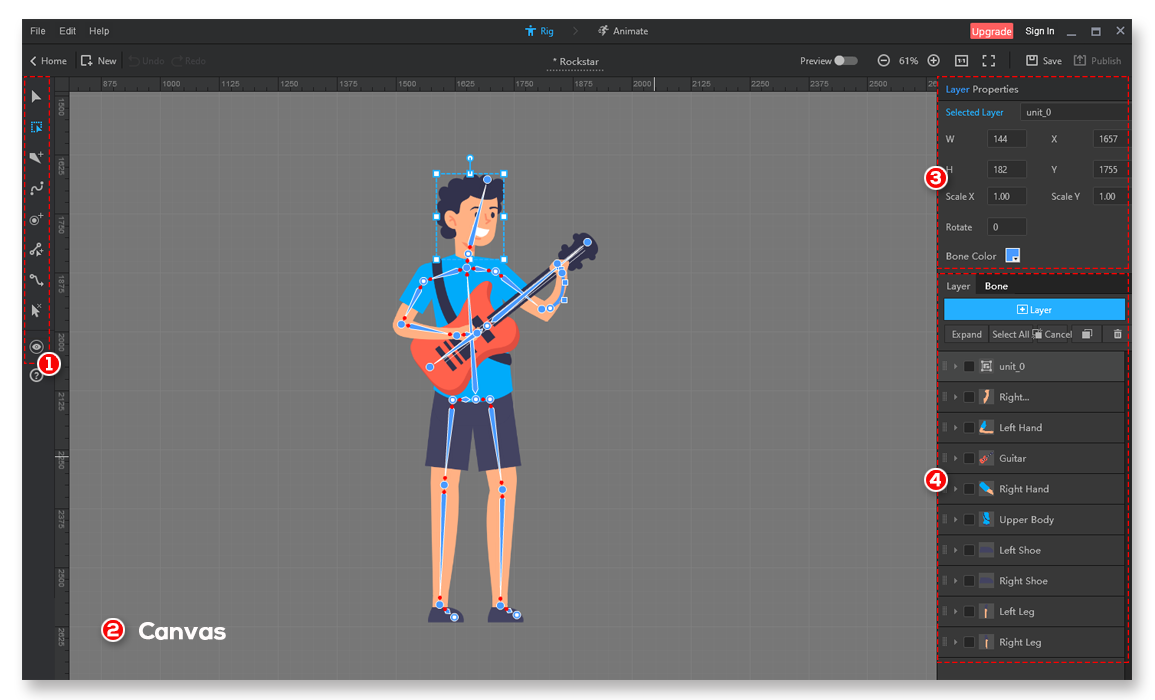
1. Bone Tools
Use these tools to create and configure bones.
2. Canvas
This is the region where you create and view your designs and animations.
3. Property Panel
View or edit the properties of the selected bone or layer.
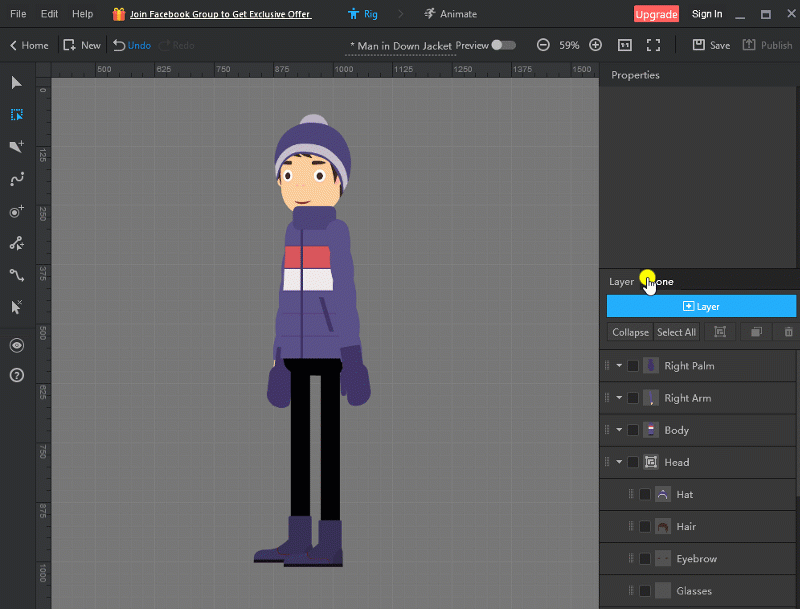
4. Layer Panel/Bone Templates
- The Layer Panel lists all the layers and layer groups in your project. You can use the Layer Panel to arrange the layers/groups, show or hide layers, add a new layer, and so on.
- Click the “Bone” tab to access a list of pre-created human and animal bone structures.
Animation Editor (Animate Mode)
Animation Editor is where you design and preview your animations.
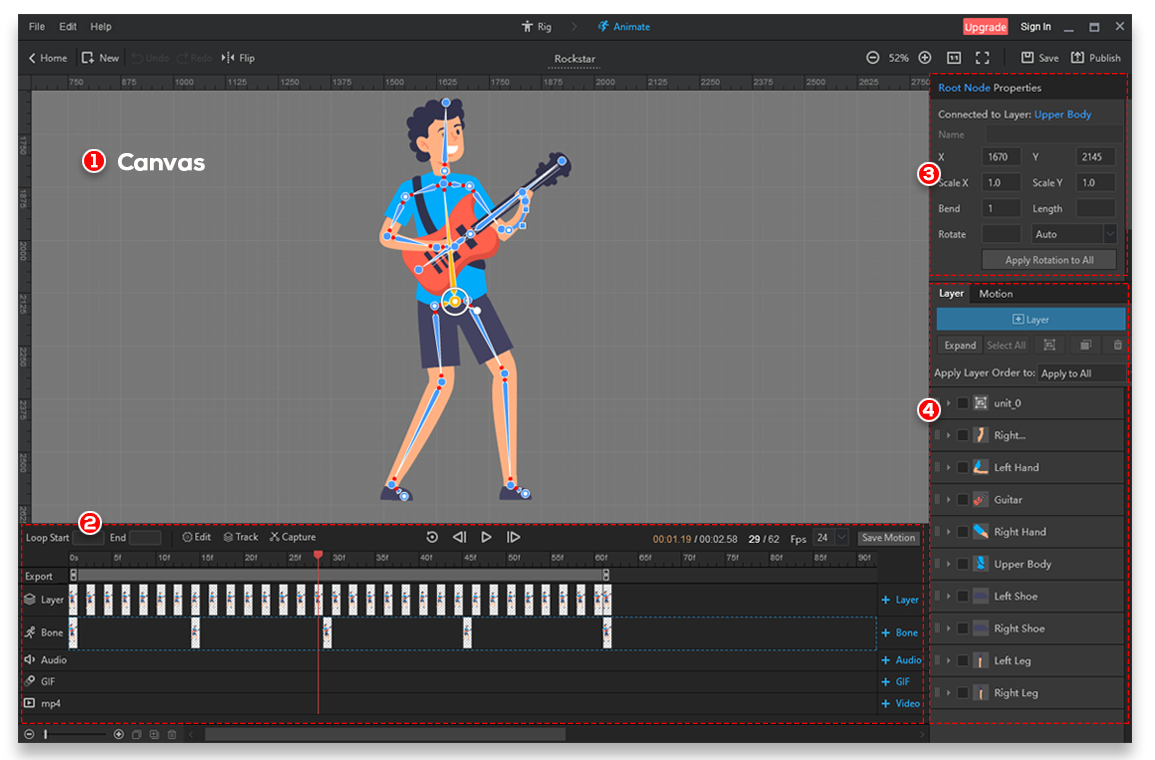
1. Canvas
Your designs and animations are displayed in this area.
2. Timeline
In Animate mode, the Timeline allows you to control the playback and the animations.
3. Property Panel
View or edit the properties of the selected bone.
4. Layer Panel/ Motion Library
- The Layer Panel lists all the layers and layer groups in your project. You can use the Layer Panel to arrange the layers/groups, show or hide layers, and so on.
- Click the “Motion tab” to access a wide range of pre-made motions.
Part 3: How to Make Your Own Animated Character #
Once you successfully run Mango Animate CM, log in to your account, then you can start your journey of character animation.
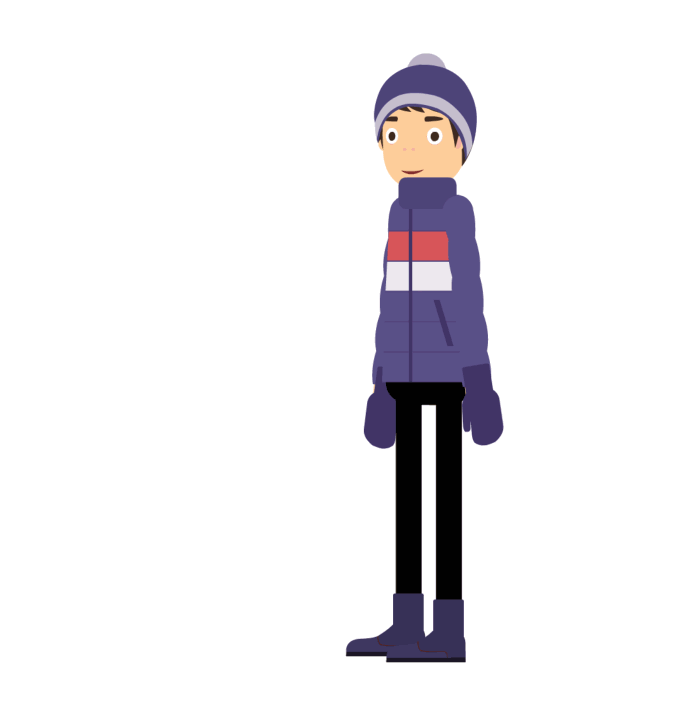
In this tutorial, we will use Mango Animate CM to animate a template character (in this case, a boy) so that he runs and jumps.
Step 1: Preparing Your Character
Before adding bones, the first thing you need to do is to select and prepare your character.
In the Home Screen, click the Character Template tab, then select a character from the library.
Step 2: Customizing Your Character
Click the Edit Side View button, the Edit Character panel appears. Feel free to change the clothes, accessories, and facial expressions of the character.
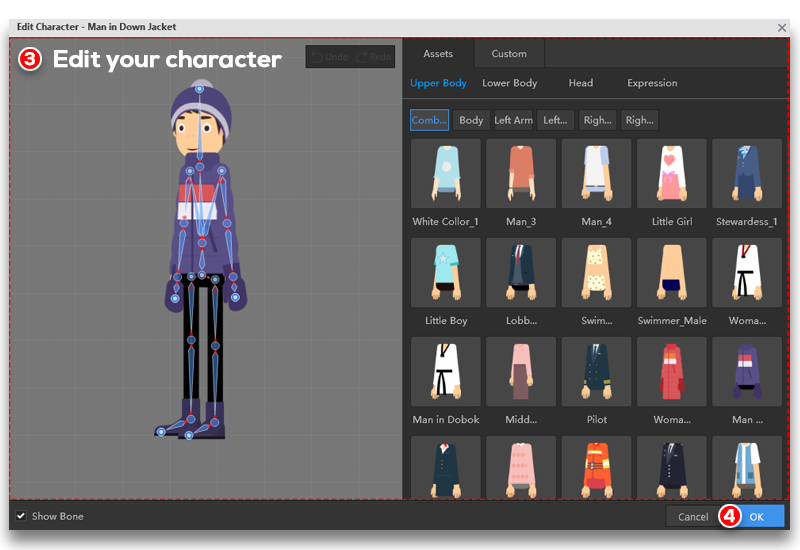
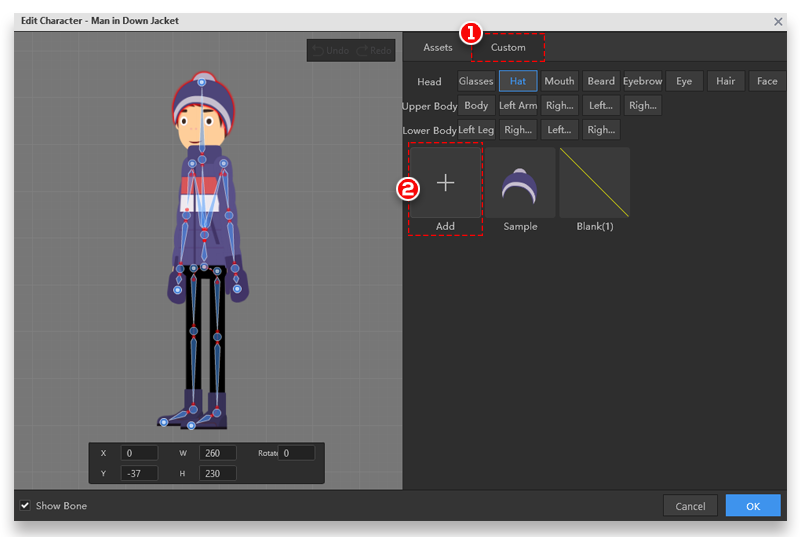
You can also import your own assets to give the character a distinctive charm.
In the Edit Character panel, click “Custom” > click the Add button > import your images.
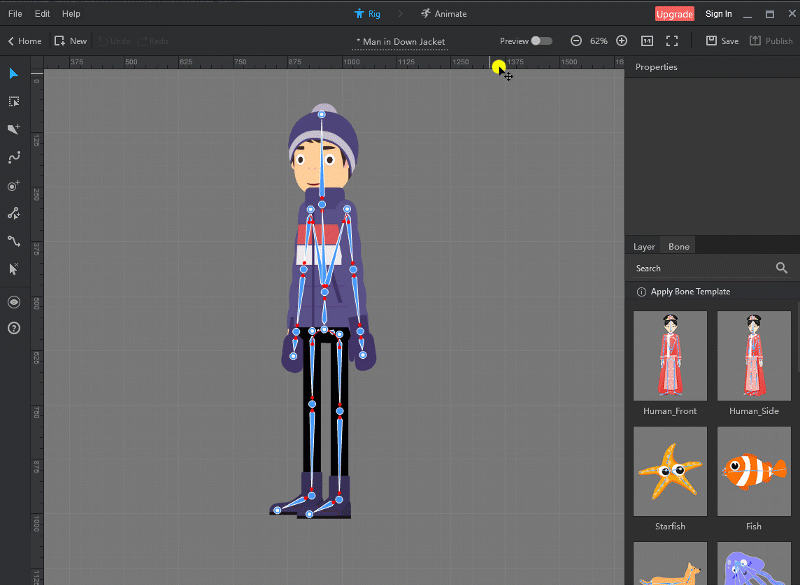
Step 3: Building the Skeleton
Once you have finished designing your character, you can start adding bones.
There are 3 different ways to add bones. The easiest and fastest way is to use a character template. Each character template in Mango Animate CM
comes with a pre-created skeleton, which means you can just skip the adding bones step.
You can also add bones manually or apply a pre-built bone template. These 2 methods are described below.
Method 1: Add Bones Manually
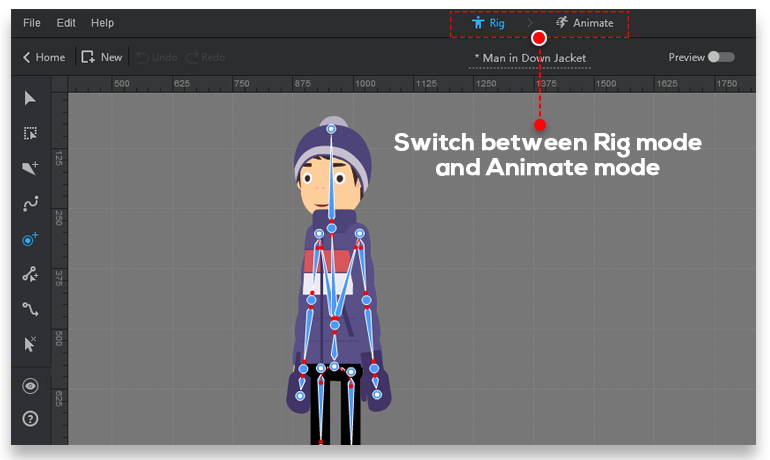
- Make sure you are working in Rig mode. To switch to Rig mode, click the Rig button in the upper center of the screen.
- Use bone tools to create bones.
Method 2: Use a Bone Template
- In Rig mode, click the “Bone” tab in the right-side panel to access a library of bone templates.
- Select a template, drag and drop it over the character.
Previewing
In Preview mode, you can rotate and move any bone to see how the layer will be influenced by it, without actually creating any animation. If you do not add bones properly, you can always stitch to Rig mode to modify them.
Step 4: Animating Your Character
Now that the boy has a fully functional skeleton, it’s time to switch to Animate mode and start animating it. There are 2 ways to create animations.
Method 1: Apply Template Motions
The simplest way to create animations is to use template motions.
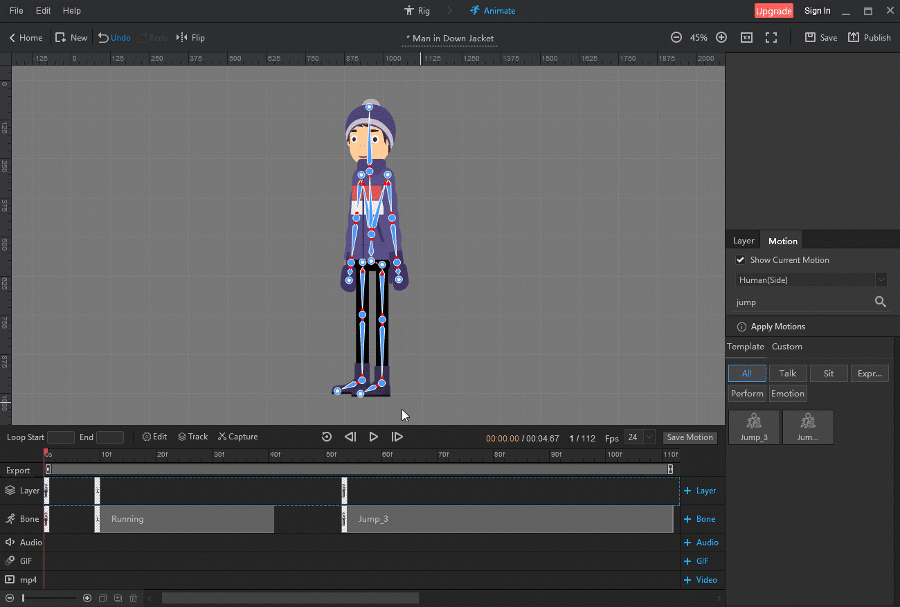
Click the “Motion” tab on the right > select the desired motion from the motion library > drag and drop the selected motion to the Timeline
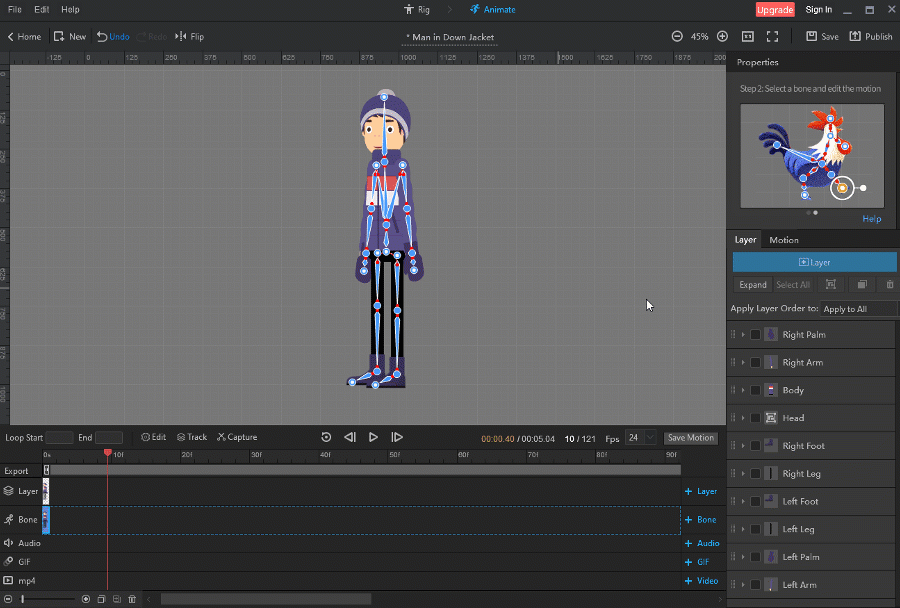
To animate the boy so that he runs and jumps, you can simply search the running and jumping motions in the motion library, then apply them.
Method 2: Create Your Own Motions
Apart from applying built-in motions, you are free to create your own animations.
To create your own motion:
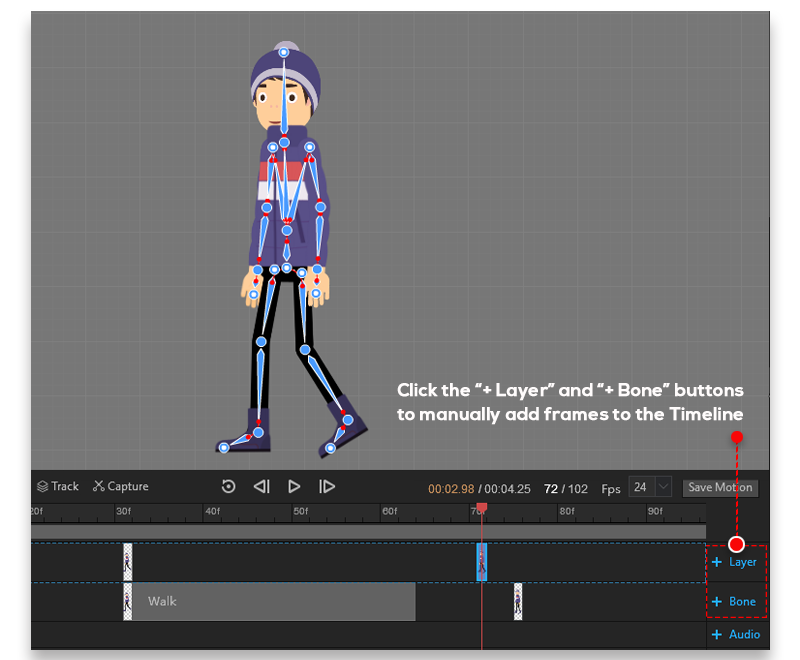
- Add Layer/Bone Frame
Layer Frame: Rearrange layer order and replace layer image.
Bone Frame: Defines the pose/animation of your character.
Click the “+ Layer” and “+ Bone” buttons to manually add frames to the Timeline.
- Enable Auto Keyframe
Auto Keyframe allows automatically inserting frames when you animate your character.

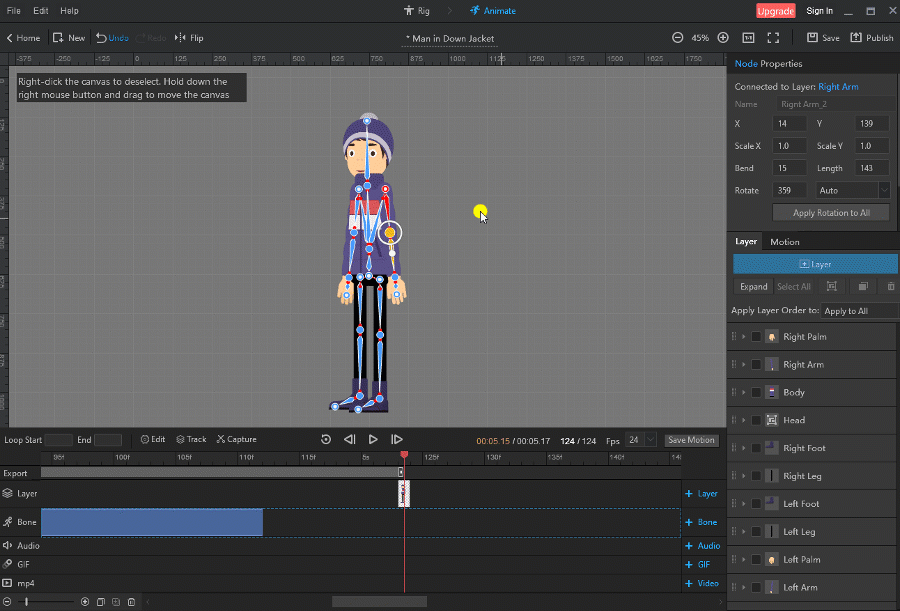
- Control the bones to set poses for your character
On the canvas, rotate and move bones to create different body movements.
To Change Facial Expressions:
On the canvas, double-click the target body part, the Replace Layer panel will pop up > select a desired image from the list or click the Add button to import your own.
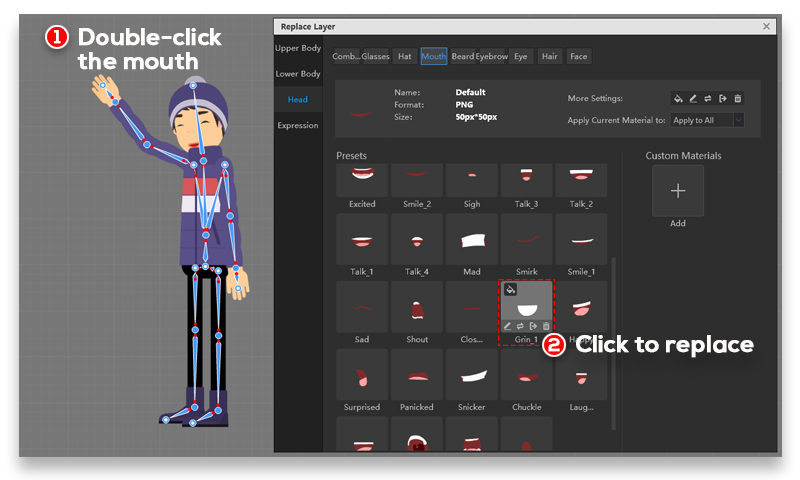
In the example below, you can see that the boy’s facial expression has changed.

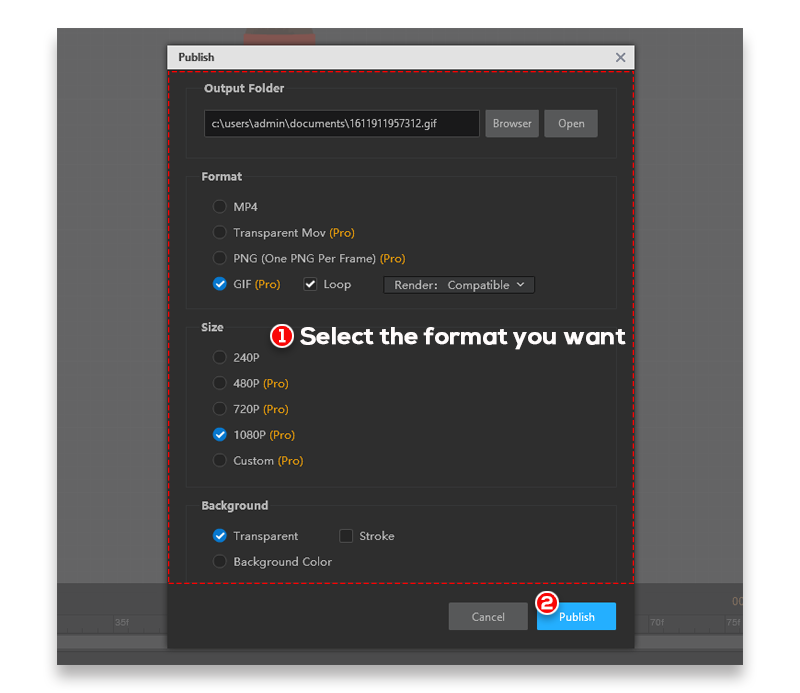
Step 5: Preview and Export
Now that you have finished creating animations for your character, you can preview and save your work.
Click the Publish button in the upper right corner, the Publish panel appears. Select the format you want and click “Publish”.