There are 2 ways to add bones: 1. Add straight/curved bones; 2. Use a bone template, here is a tutorial on how to do this.
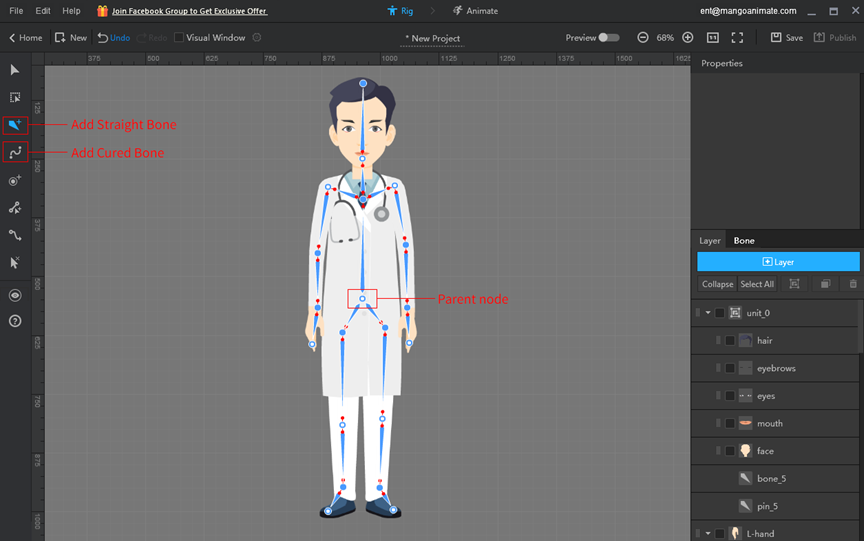
1. Add straight/curved bones
After importing an image file, go to the bone editor.
- Click [Add Straight Bone] / [Add Curved Bone];
- Click to add the parent node, and click to add child nodes from the parent node;
- Right-click to finish adding.
(Click to view: Add straight bone)
(Click to view: Add curved bone)
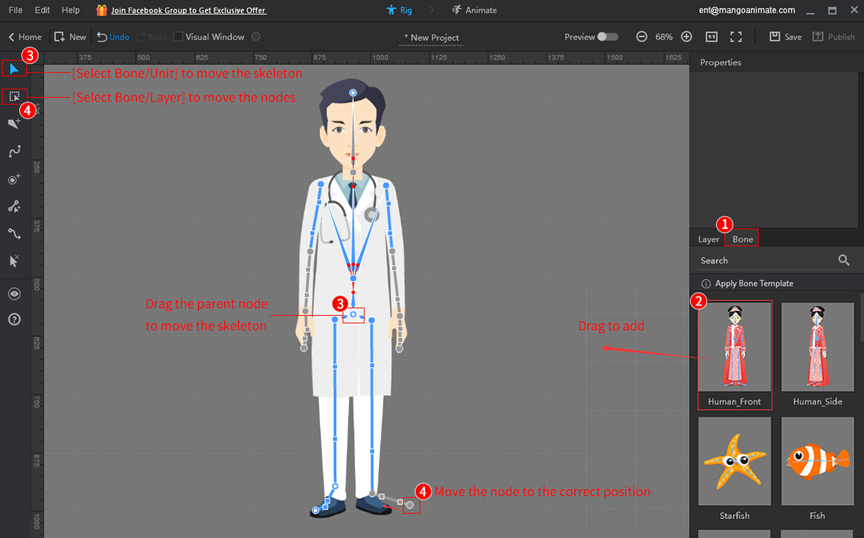
2. Use a bone template
Drag a bone template to the character, and adjust the position of each bone to the corresponding layer.
Note: When adding a bone template, the skeleton may not be added precisely to the character, you will need to zoom out the canvas to find the skeleton and move it to the character.
(Click to view: How to scale and move the canvas?)
(Click to view: How to move the skeleton and adjust its position after adding a bone template?)