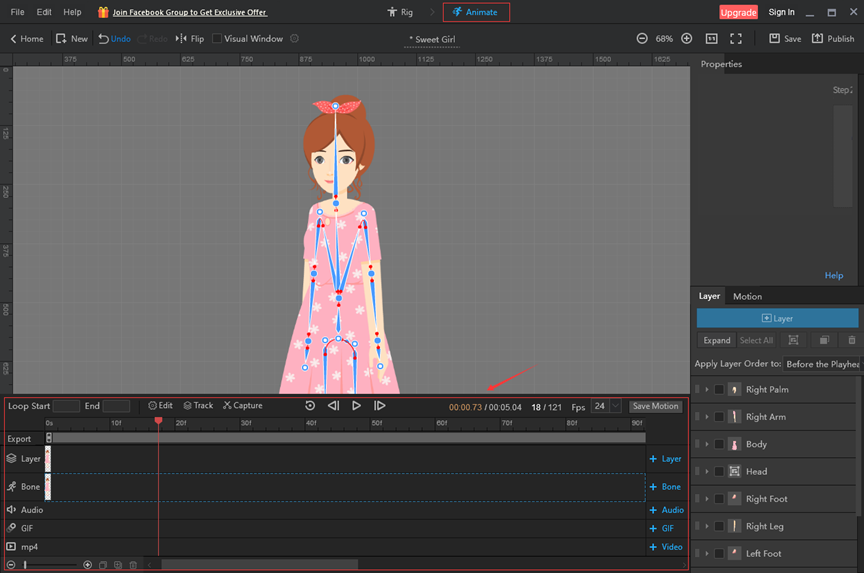
After adding a skeleton to the character, you can proceed to the animation editor to animate it. Today we’re going to take a closer look at the animation timeline in the animation editor.
In the animation timeline you can add motions, expressions, etc. by adding layers frames and bone frames; preview character motions; customize the frame rate and duration of character animations, etc.
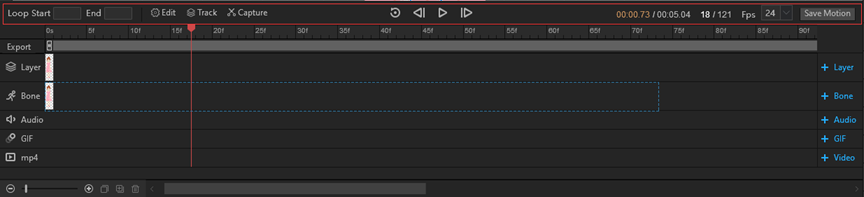
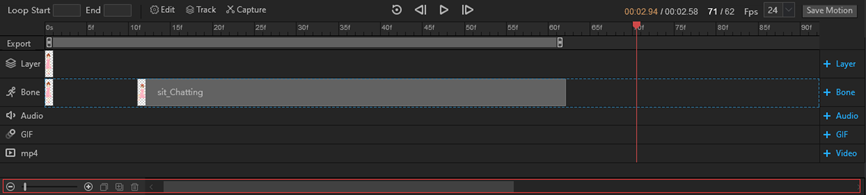
1. Settings bar of the timeline
In this area you can set loop playback; hide/show character movement tracks, and bones; set auto keyframes; hide/show tracks; action capture; control animation playback; set the total duration and frame rate of character actions; save motions.
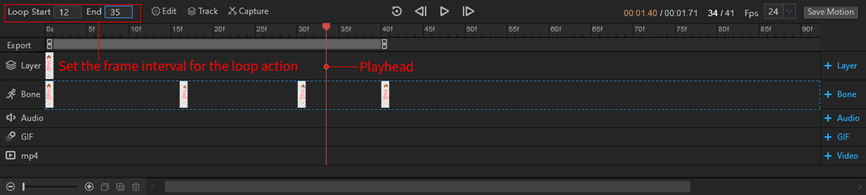
(1) Loop Start/End: Set the frame interval to be looped, which can be interpreted as setting the range of the preview animation. (Click to view: How to use Loop Start/End?)
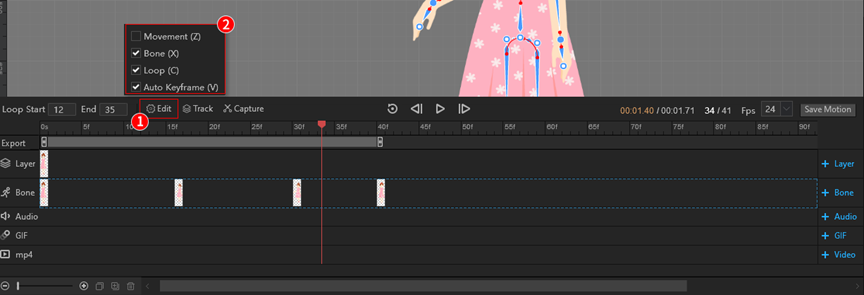
(2) Edit: You can tick movement, bone, loop, and auto keyframe.
- Movement: When ticked, the movement track will appear when previewing the bone motion, providing assistance in editing the bone motion more accurately.
- Bone: When ticked, the skeleton is displayed on the character, making it easier to set the bone properties. (Click to view: How to hide or show the character’s movement tracks and bones?)
- Loop: When ticked, the animation can loop indefinitely when previewing.
- Auto keyframe: When ticked, a new keyframe will be automatically added to the location of the playhead when modifying the character’s motions in the canvas. (Click to view: How to use auto keyframe?)
(3) Track: Tick the box to display audio, GIF, and MP4 tracks where you can add audio, GIF, and MP4. Tracks that are not required can be unticked.

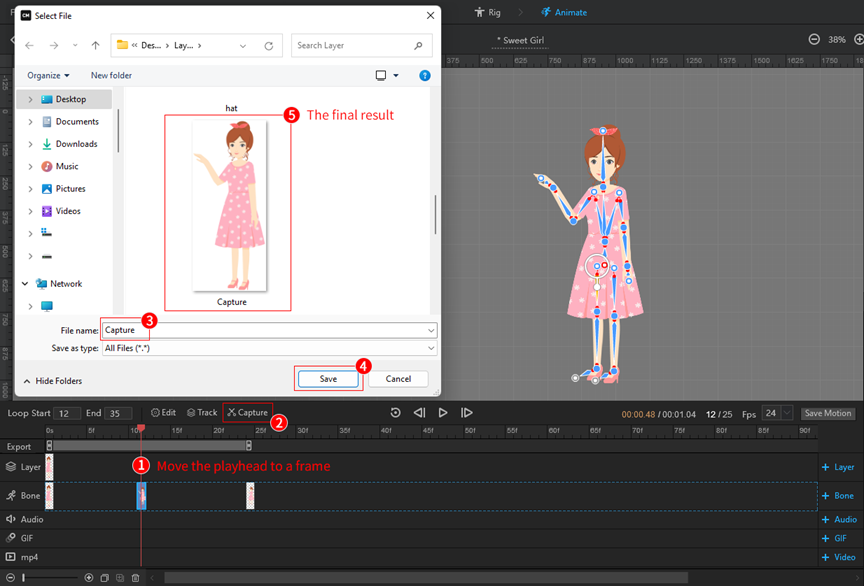
(4) Capture: The [Capture] feature can be used when you want to save the motion of a particular frame of your character. Click on it to take a screenshot of the motion in the frame where the playhead is located as a PNG file and save it in a local folder.
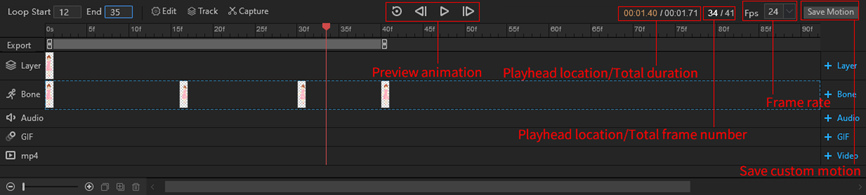
(5) Preview animation
You can control the animation playback: play from start, the previous frame, play from the current frame, next frame.
(6) Animation duration and frame number display area
You can view the time when the playhead is located, the total duration of the animation, the frame when the playhead is located and the total number of frames.
(7) Frame rate setting: You can set the number of frames per second of the animation, the higher the frame rate, the faster the movement change, and vice versa.
(8) Save motion: After adding custom motion to the character, you can use the [Save Motion] to combine the custom motion and save it to the software’s custom motion library. (Click to view: How save custom motion?)
2. Animation edit area of the timeline
In this area, you can use layer frames and bone frames to add expressions and actions to your characters; add audio, GIF, and MP4 to preview the effect when you subsequently use your characters to animate videos; select a piece of animation to publish using the [Export] feature.
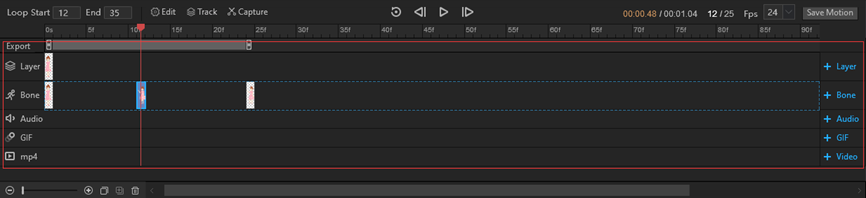
(1) Layer track: Here you can add, edit and move layer frames. (Click to view: How to use layer frames?)
(2) Bone track: Here you can add, edit and move bone frames. (Click to view: How to use bone frames?)
(3) Audio, GIF, MP4 track: You can add audio, GIF, and MP4 here to provide a reference for subsequent use of the character in animated videos.
(4) Export: When you only want to publish a part of your character’s motion, you can use [Export] to select any animation segment to publish. (Click to view: How to export a piece of animation?)

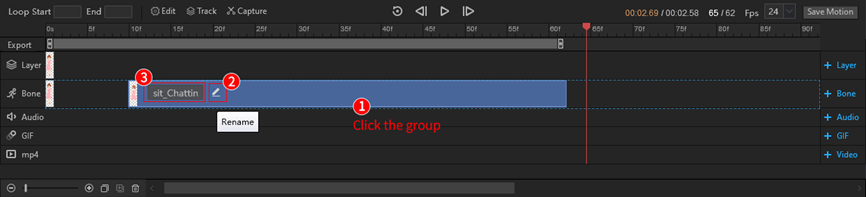
(5)Modify motion name: You can click on a motion group to rename it.
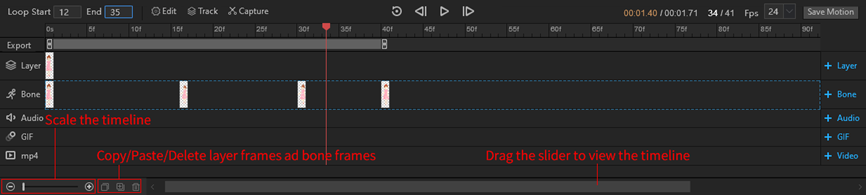
3. Toolbar of the timeline
You can zoom and move the timeline to make more precise edits to character motions; you can also copy, paste and delete layer frames and bone frames.
(1) Scale the timeline: Easy detail editing of layer frames and bone frames on the timeline. Drag the slide button or click [-]/[+] to scale the timeline.
(2) Copy/paste/delete keyframes: Click a layer frame/bone frame and click the [Copy]/[Paste]/[Delete] button.
(3) View timeline: Drag the slider to view the timeline.
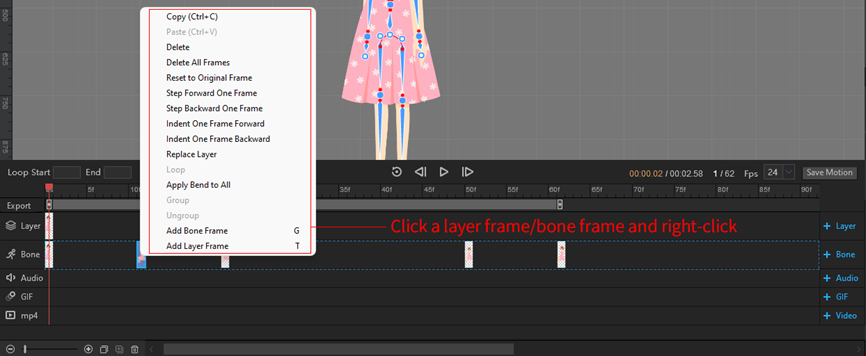
4. Right-click operations in the timeline
Using the right-click operations makes it easier and faster to animate the character.
(1) Click a layer frame/bone frame and right-click to do the following: Copy, delete, delete all frames, reset to original frame, step forward one frame, step backward one frame, indent one frame forward, indent one frame backward, replace layer, apply bend to all, add bone frame, add layer frame.
(2) Multi-select layer frames/bone frames, right-click and select [Group] to combine them; select a group and right-click and select [Ungroup] to decompose it. (Click to view: Group and ungroup layer frames or bone frames)


