Three steps to add motions to a custom character:
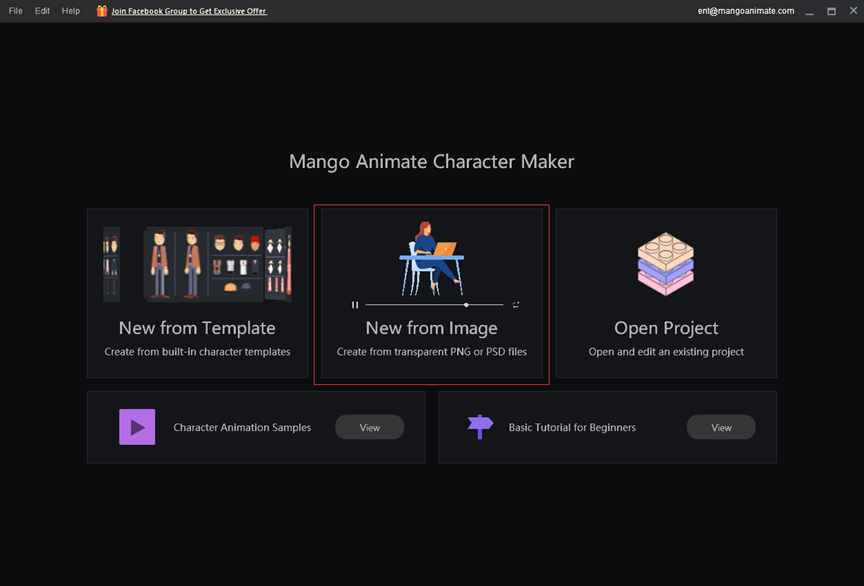
Step 1: Import an image file (Here is an example of importing PSD files to add motions.)
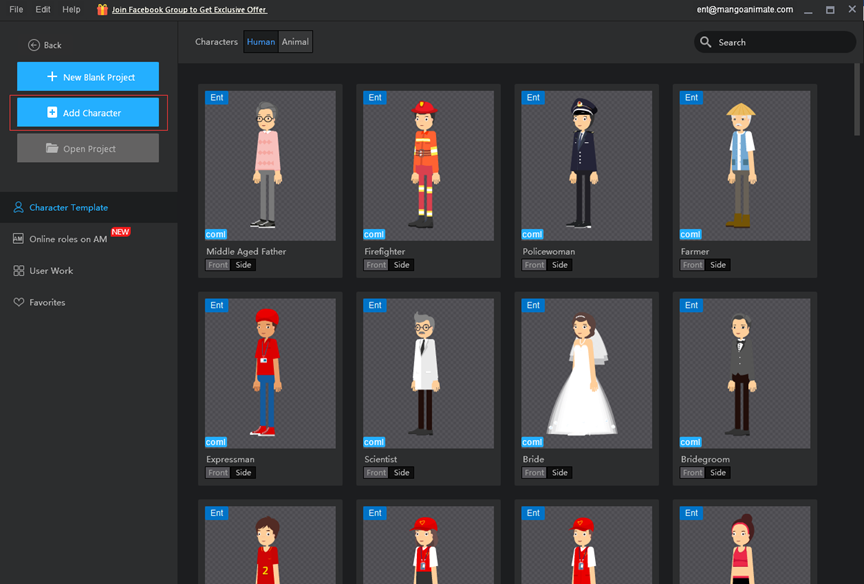
Click [New from Image] on the start screen or [Add Character] on the home screen to import a PDF file.
Step 2: Build the skeleton
Adding bones in the bone editor, you can use a bone template or customize a skeleton.
Note: The character’s face, eyebrows, eyes, nose, mouth, and hair need to be combined before adding bones to avoid the five senses organs being separated from the face when adding motions. (Click to view: How to combine multiple layers in a group?)
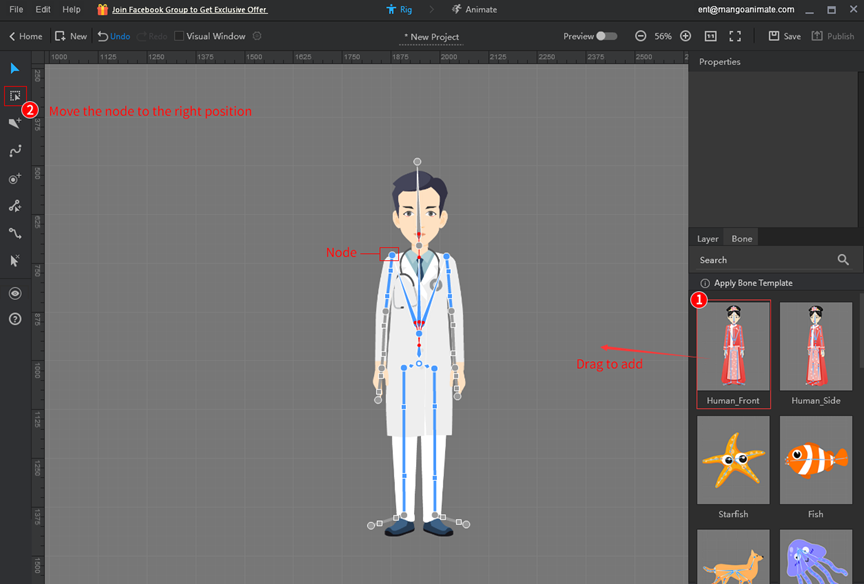
1. Use a bone template
Drag a bone template to the character, use a bone tool to move the node to the right position, and then bind the node to the corresponding layer.
Note: When adding a bone template, the skeleton may not appear precisely on the character layer, so you will need to shrink the canvas and move the whole skeleton onto the character.
(Kliknij, aby wyświetlić: Jak skalować i przesuwać płótno?)
(Click to view: How to move the skeleton and adjust its position after adding a skeleton template?)
Once added the bone template, you will notice that the bones are greyed out. You need to move each bone to the appropriate position on the character layer and bind the bone nodes to the layer.
(Click to view: Why are the added bones greyed out?)
(Kliknij, aby wyświetlić: Jak powiązać węzły szkieletu z warstwą?)
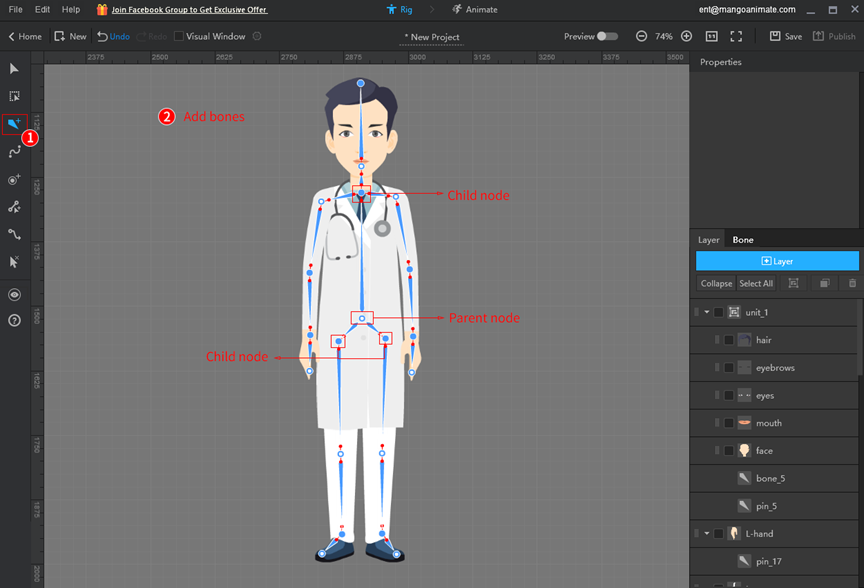
2.Customize a skeleton
It is recommended to add straight bones to the human character.
Make sure you are working in rig mode (bone editor). To switch to rig mode, click [Rig] at the upper of the screen > [Add Straight Bone].
Establish the position of the parent node, the figure is generally the core position, from the parent node divided into the upper and lower body to determine a child node, and then branch out from the child node, add other child nodes in the figure joints to complete the overall skeleton.
Note: When the figure does not show visible hip joints, then the lower body can be left without adding hip child nodes.
Check the nodes are bound to the correct layer, for example, the arm node should be bound to the arm and not to the body.
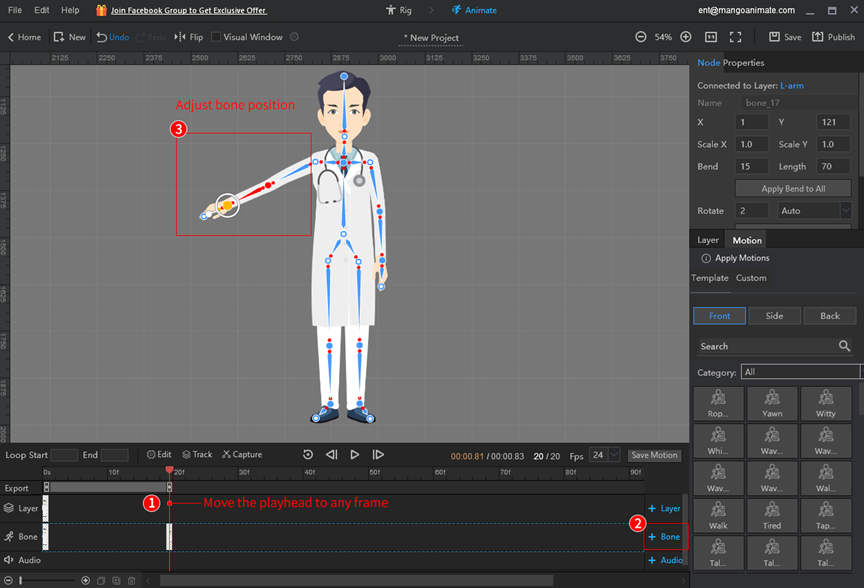
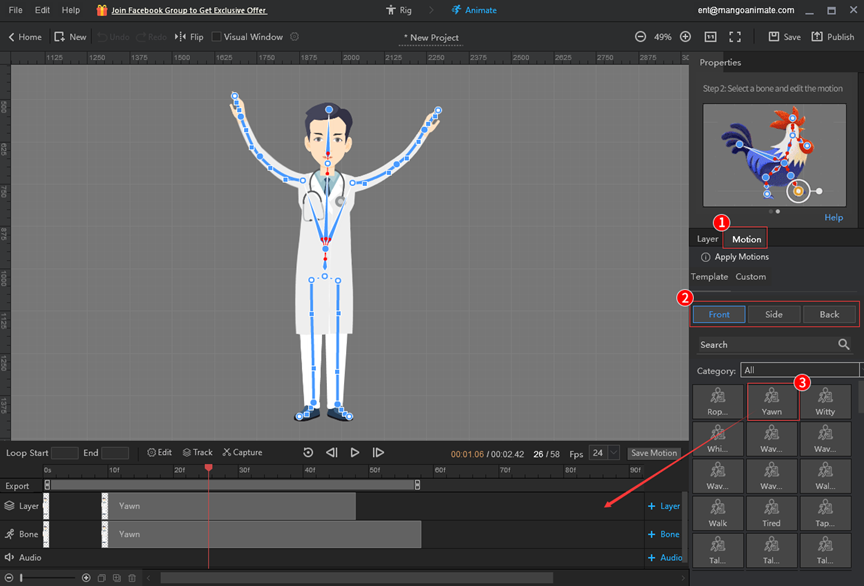
Step 3: Animate the character
Now the character has a fully functional skeleton, it’s time to switch to animate mode (animation editor) and start animating it. There are 2 situations of adding motions to the character.
1. Add motions after using the bone template
Apply template motions or use layer and bone frames to customize motions.
2. Add motions after adding a custom skeleton
Move the playhead to any frame in the timeline, click [+Bone] and adjust the position of the character’s bones within the canvas.