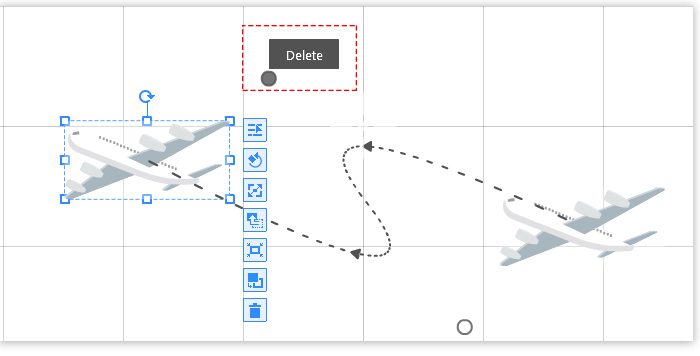
Motion path animation effect comes in handy if you want to move an object from one location to another. This effect will make your animated video more interactive and interesting.
Take a look at the example below:

The steps are as follows:
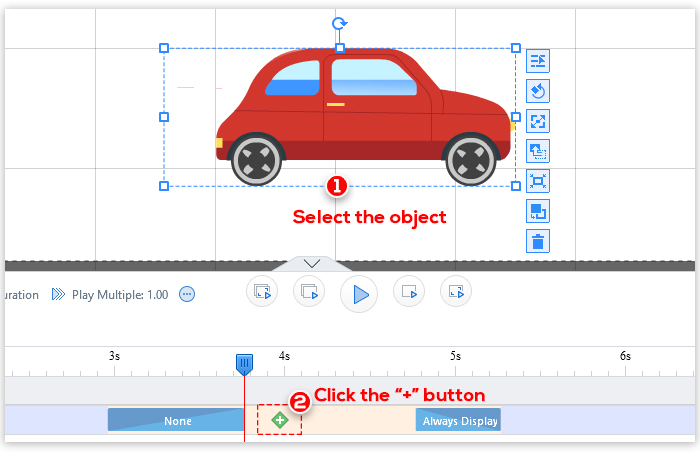
1. Select the object you want to animate.
2. On the timeline of the selected object, click the “+ ” button.
3. Click “Move” on the “Emphasis Effect” window, and click “OK”.
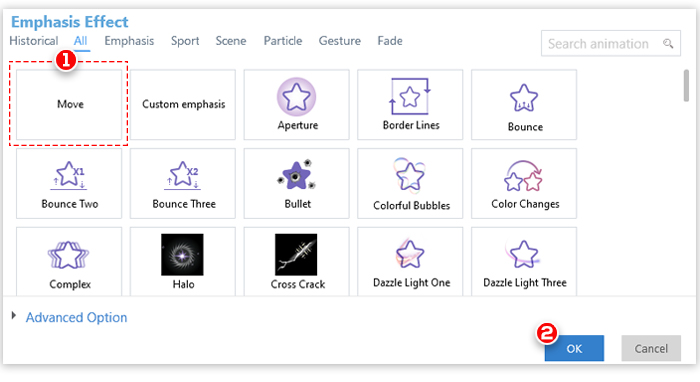
Note: you can customize the advanced options of the motion path according to your needs.

4. Editing motion paths
Mango Animation Maker allows you to create both straight and curved paths.
To create a straight motion path
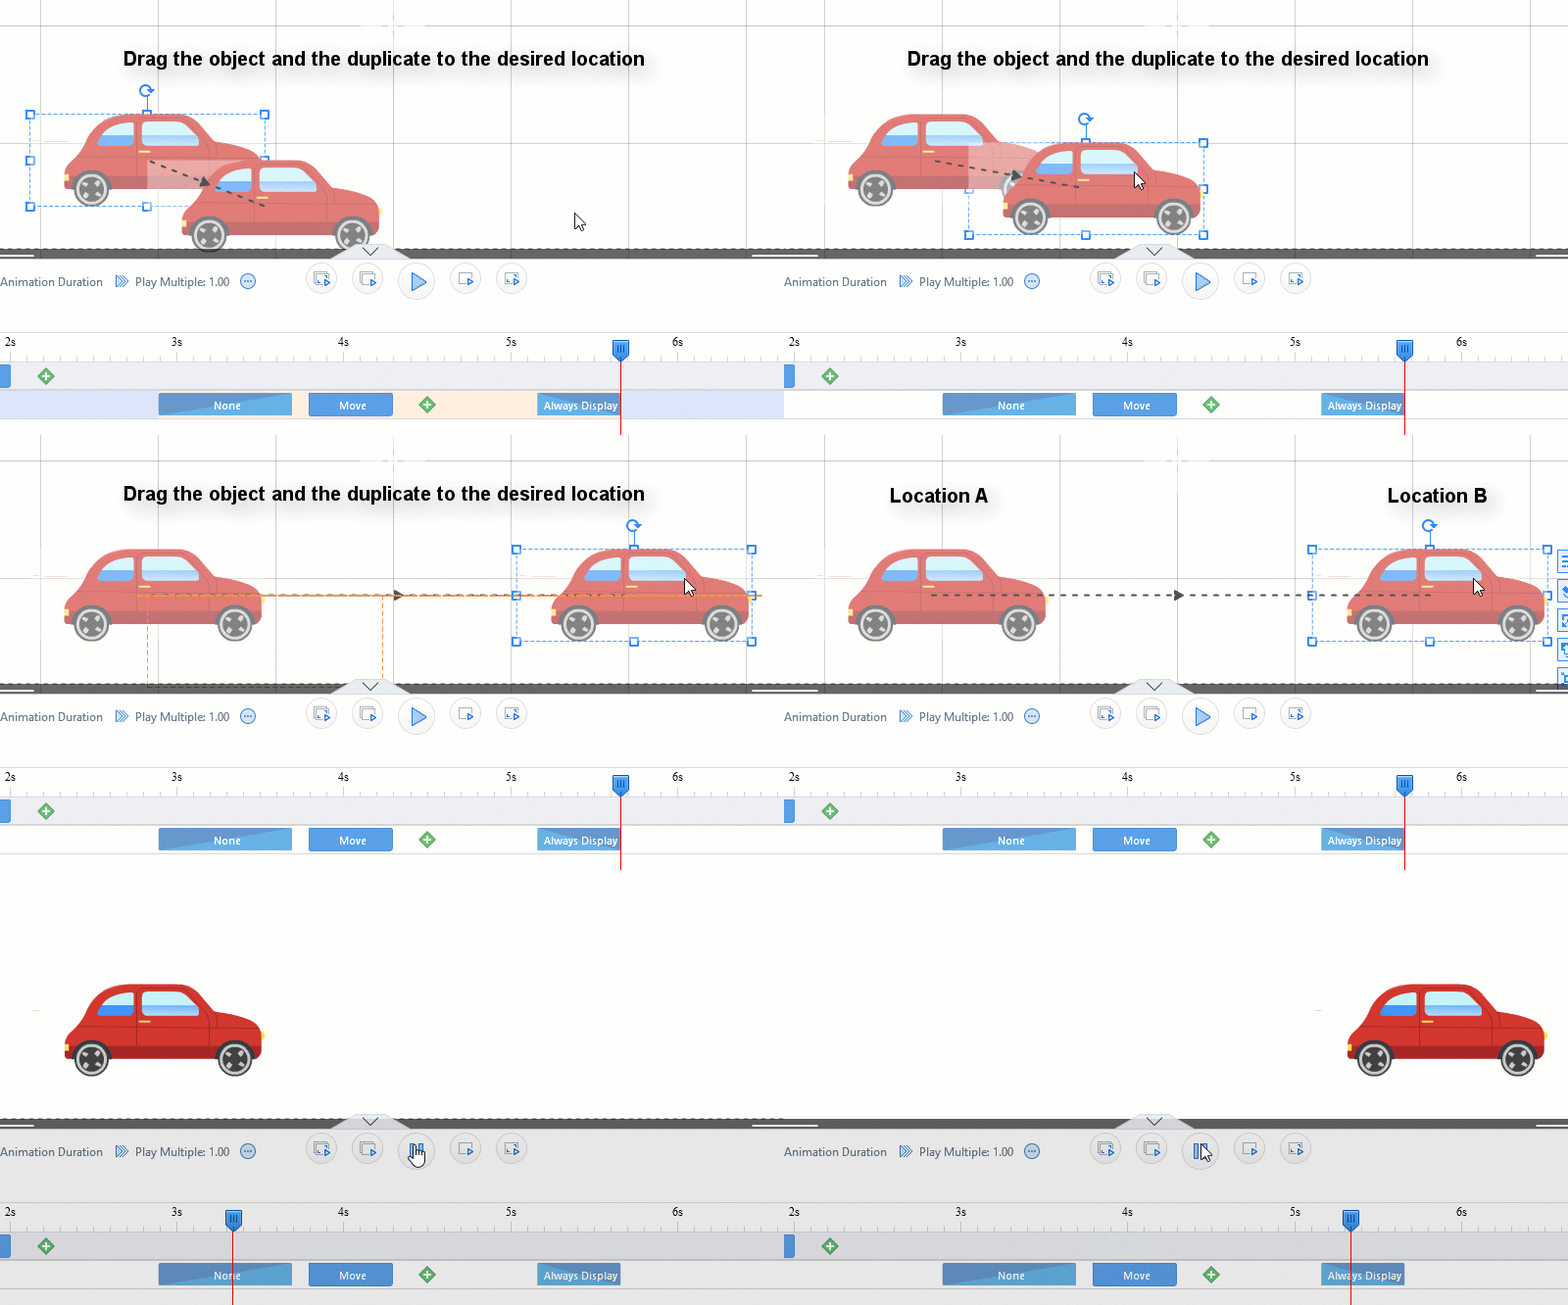
After adding the Move effect, a duplicate of the object will display on the canvas. A dotted line will connect the original object and its duplicate.
Drag the object to the desired location. The arrow will determine the direction of movement.
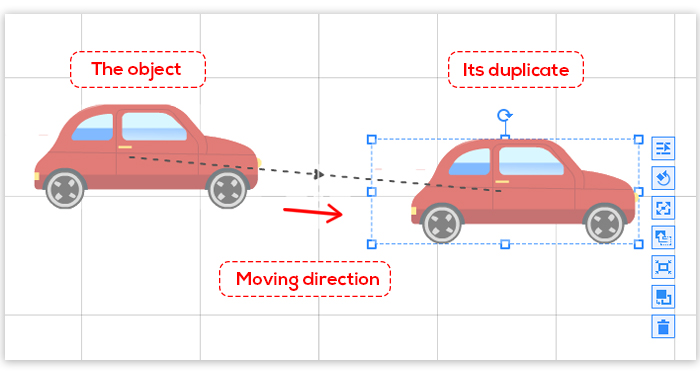
In the example below, the car is moving from Location A (the starting location) to Location B.
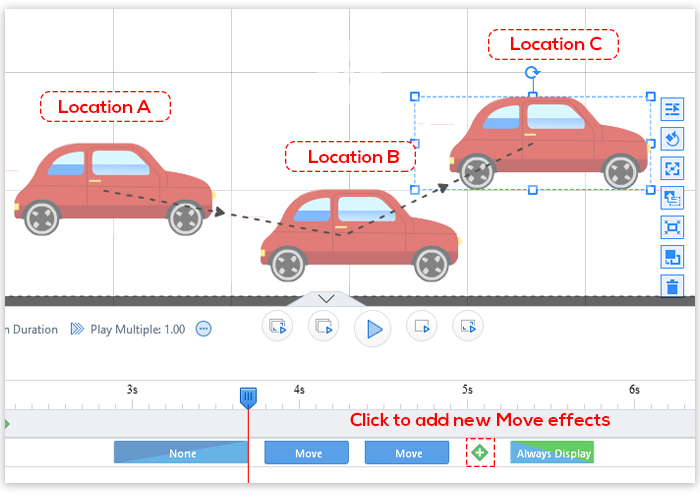
Note: to create multiple locations for an object, click the “+ ” button to apply a new Move effect. The second duplicate of the object will display on the canvas.
Drag the second duplicate to the desired location.
Repeat the steps if you want to add additional locations.
In the example below, the car is moving from Location A to Location B, and finally to Location C.
To create a curved path
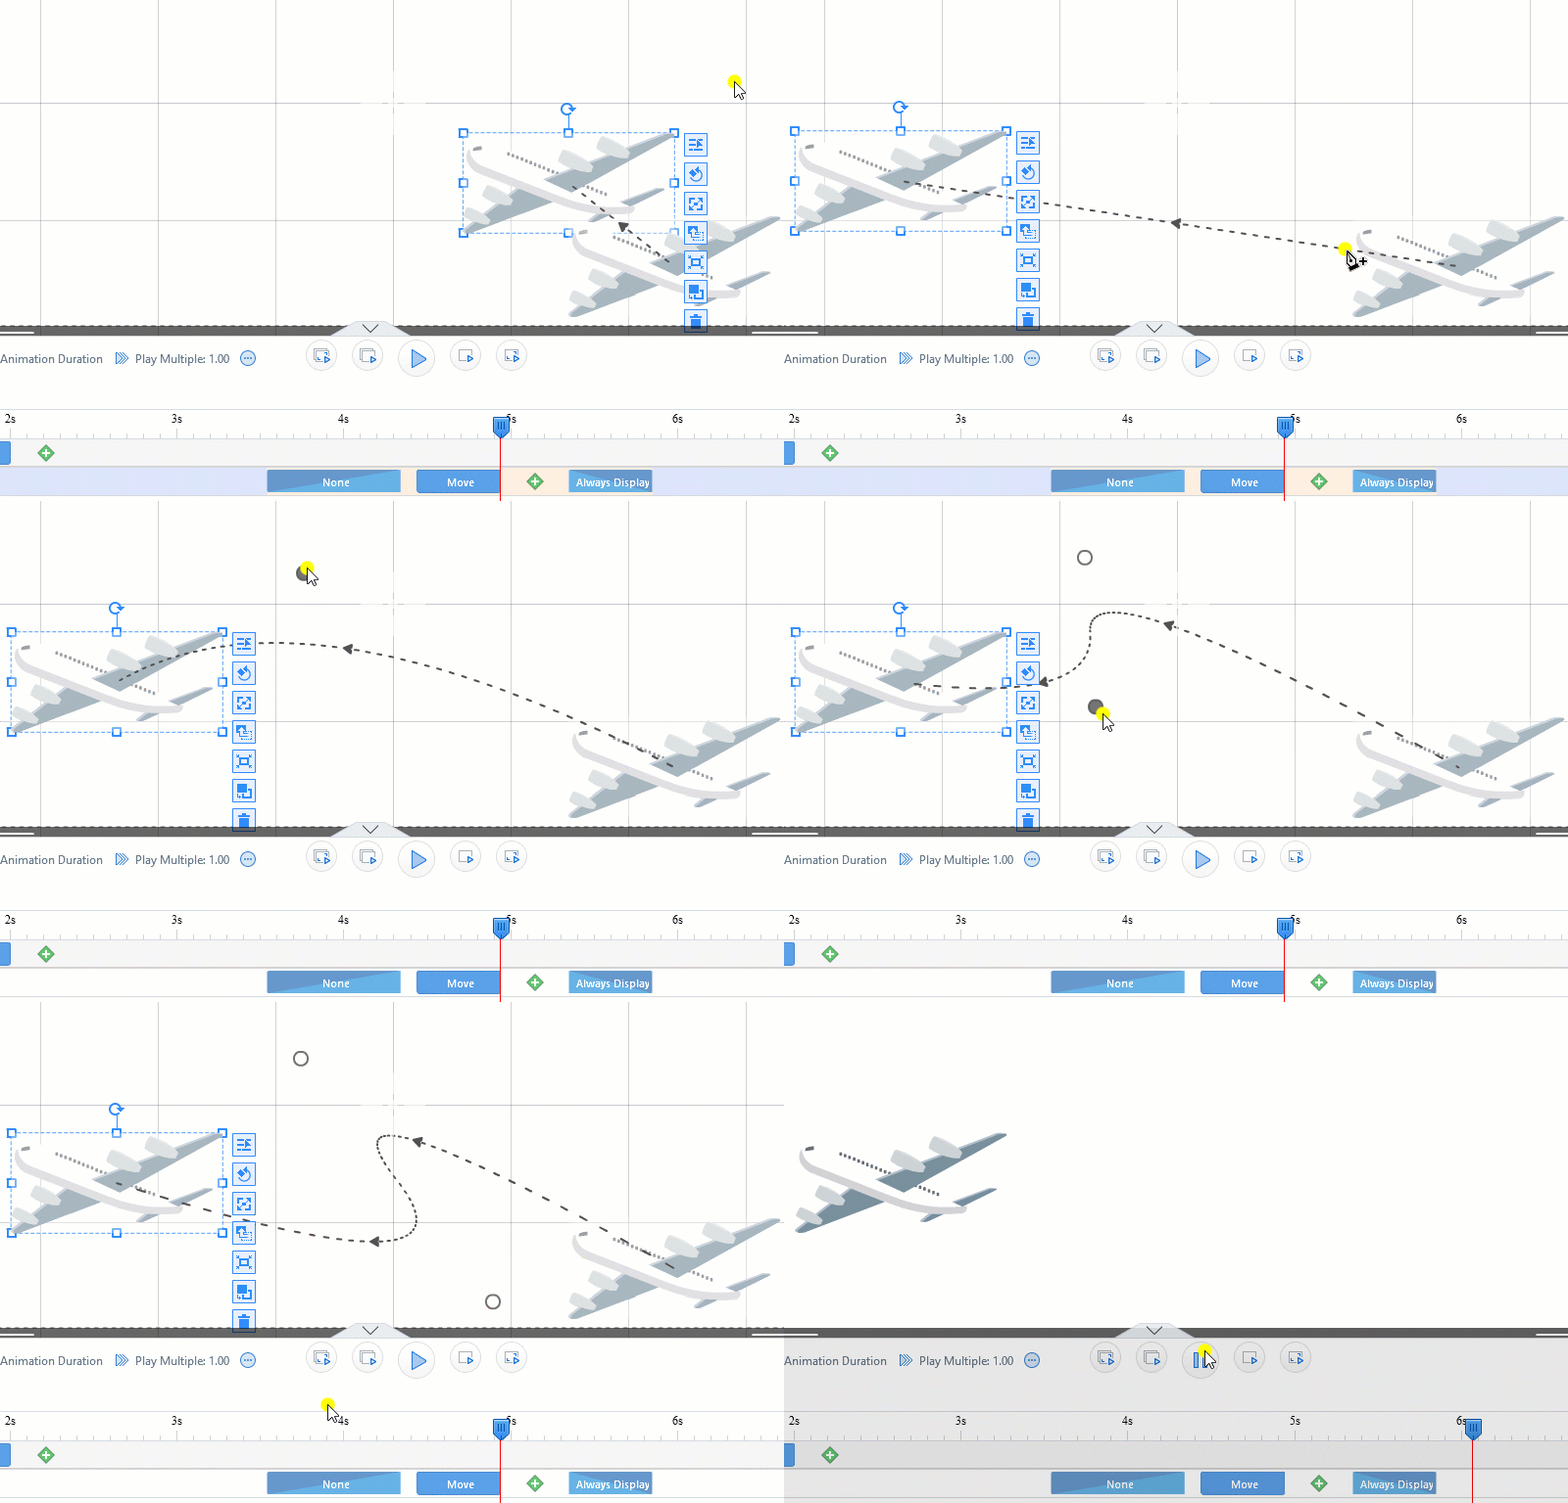
(1) Click the dotted line. A dot will appear on the canvas.
(2) Drag the dot to the desired location to create a curved path. The path will change accordingly. You can add several dots depending on your needs.
In the example below, the plane is moving from Location A to Location B following a curved path.
Note: you can hover over the dot and click “Delete” to remove it.
